Table of Contents
<ul> <li class="first"> <a href="#foundation-and-floor">Foundation and Floor</a> </li> <li> <a href="#putting-up-walls">Putting Up Walls</a> </li> <li> <a href="#finishing-the-structure">Finishing the Structure</a> </li> <li class="last"> <a href="#learnings-and-reccomendat">Learnings and Reccomendations</a> <ul class="menu_level_1"> <li class="first"> <a href="#financial">Financial</a> </li> <li> <a href="#mistakes-and-wins">Mistakes and Wins</a> </li> <li class="last"> <a href="#final-thoughts">Final Thoughts</a> </li> </ul> </li> </ul>My home in Oregon has no basement. While this is normal in an area with a shallow frostline, having grown up in Michigan I didn't know where to put all of the "extra" stuff that was overtaking my garage. To mitigate this I constructed a shed along the edge of my property to the maximum dimensions allowed without a permit in Hillsboro (200 sq ft).
Foundation and Floor
While I found many plans online for shed designs, the relatively steep sloping yard where I wanted to put my shed kept me from starting the project sooner. I eventually decided to build a foundation on concrete pillars. While this is somewhat overkill for a shed, with my slope and the wetness of Oregon I would not be confident with any less.
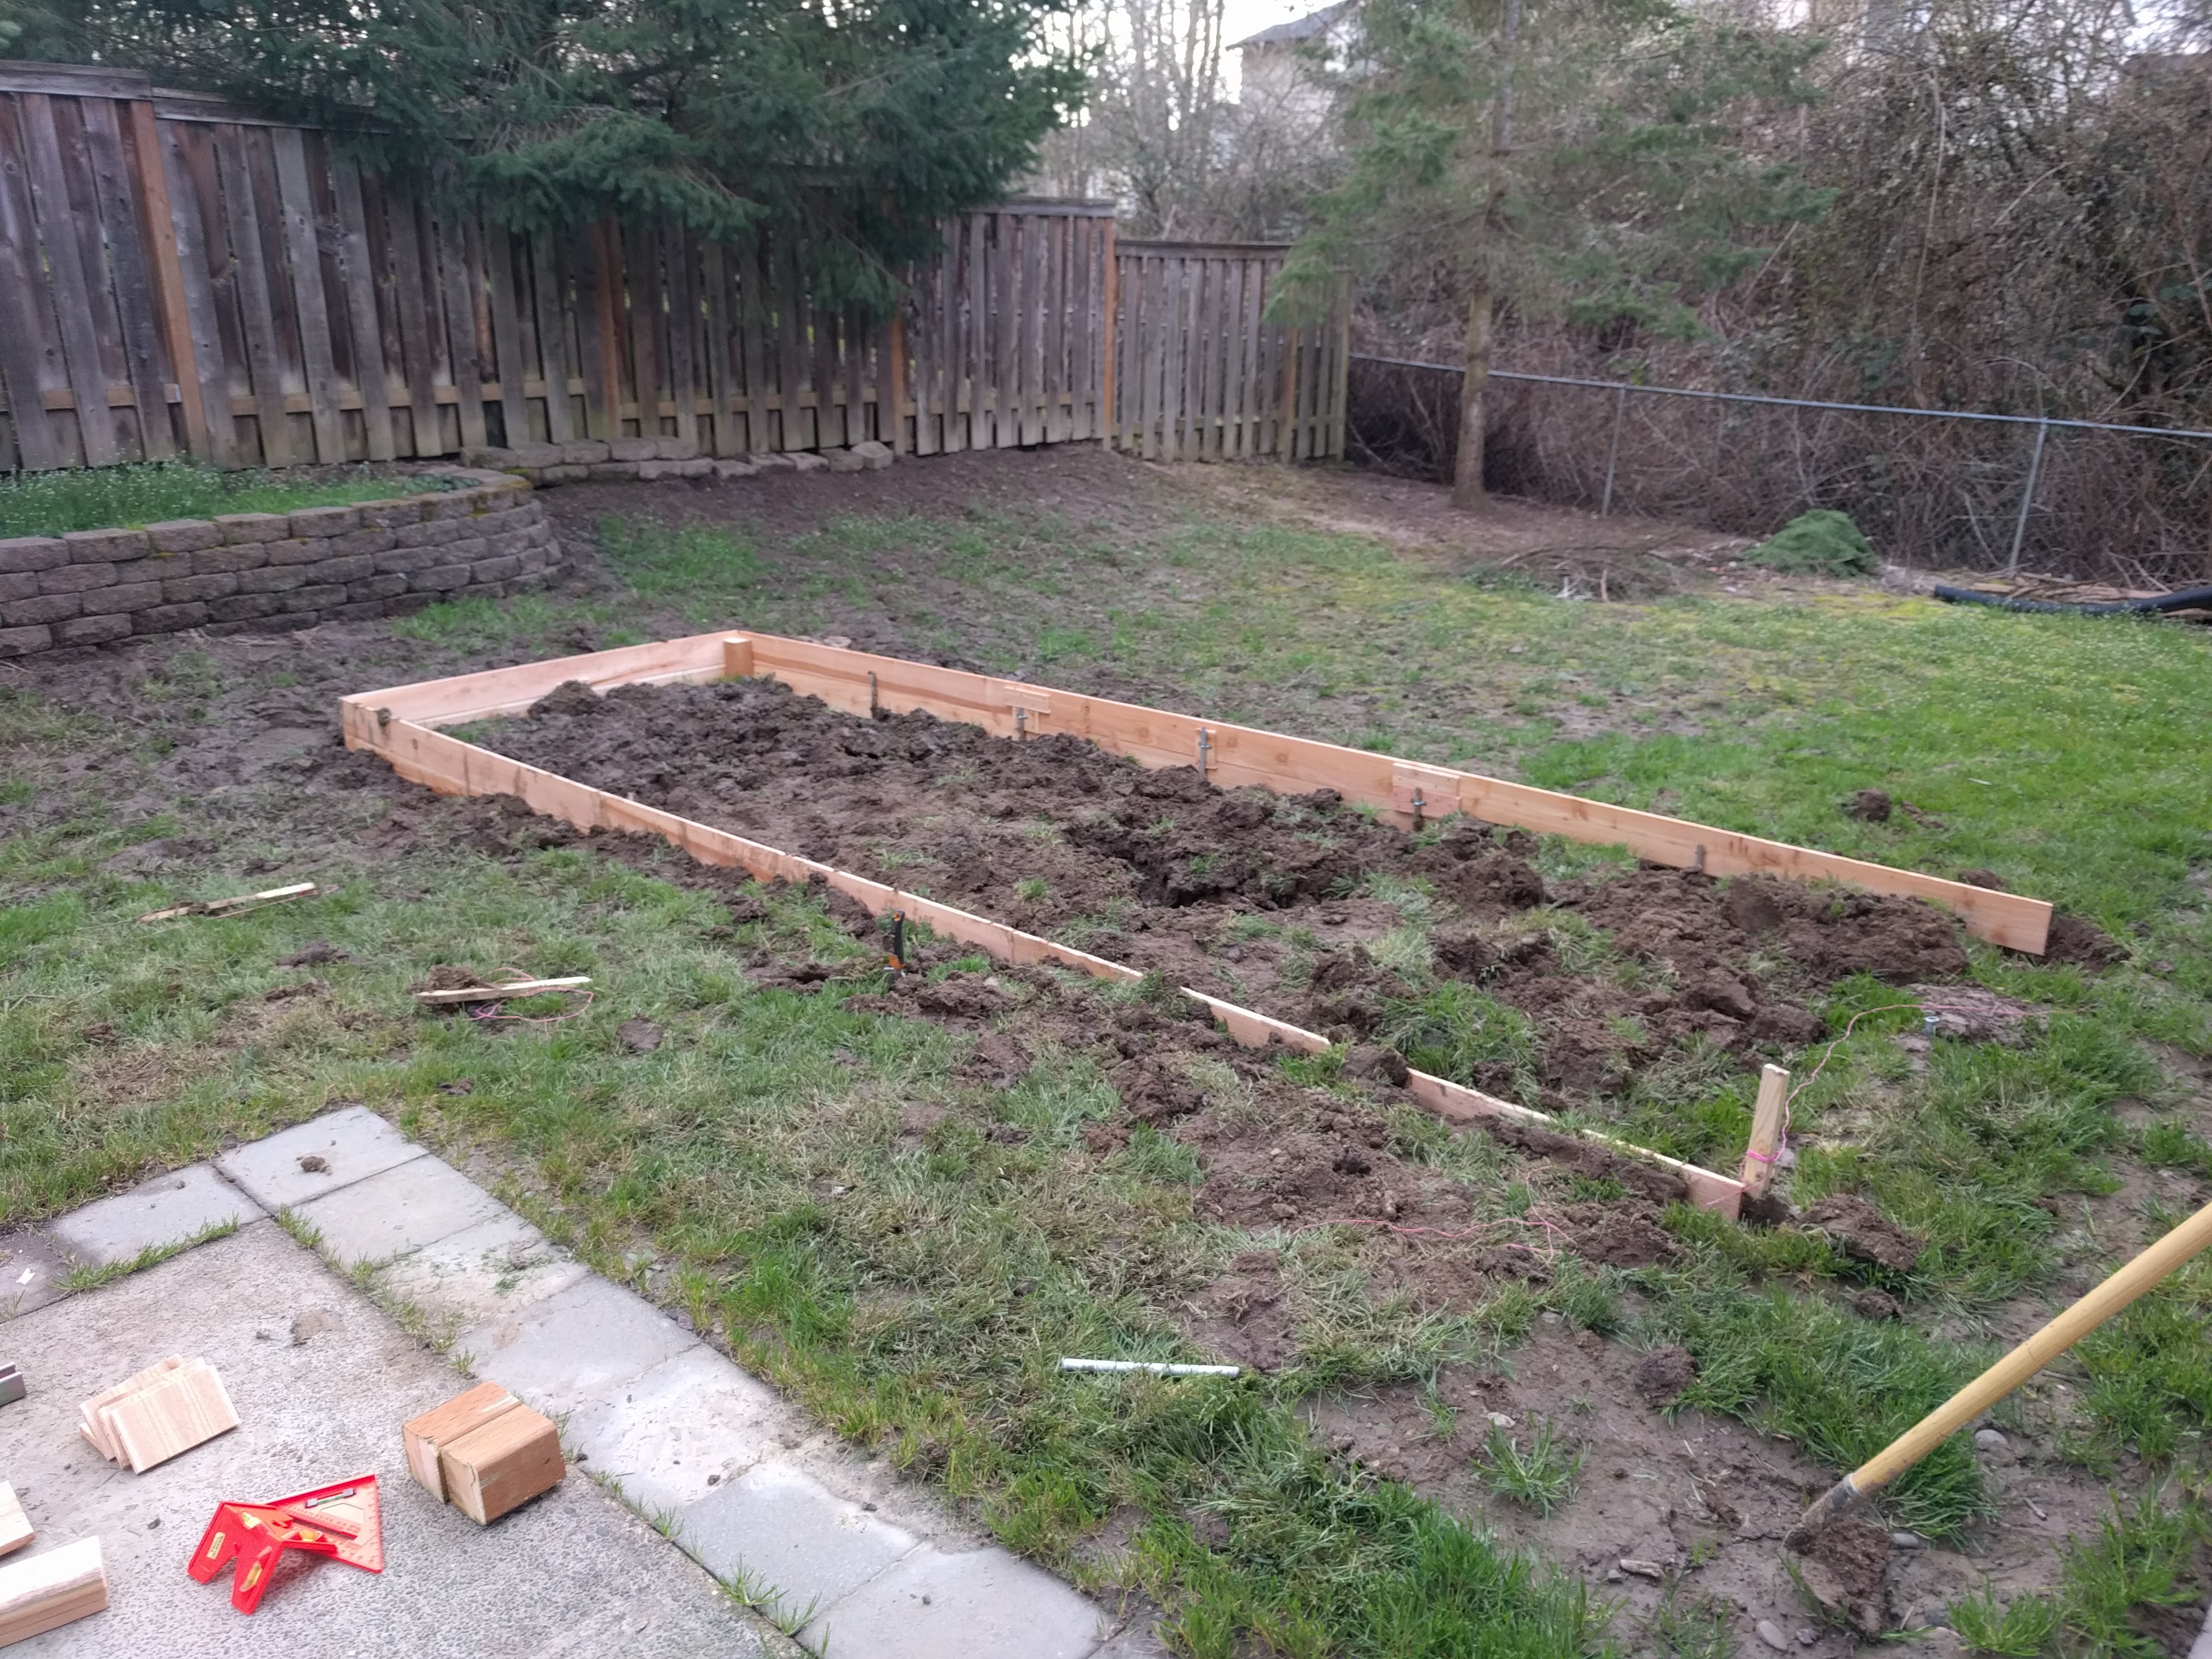
2017-03-20 A quick picture of my garden bed being built. In the background you can see the layout of the yard and a tree in the corner. Soon after this picture I felled this tree in preparation for the shed. An electric pole saw is now one of my most favourite arborist tools.
2017-09-12 I ran some string lines around the expected footprint of the shed. Eight pillars give a solid foundation for this 20ft x 10ft shed, and allows me to use four ten foot beams to support the joists. This is desirable over 20ft beams as I can transport ten foot long materials in my car.
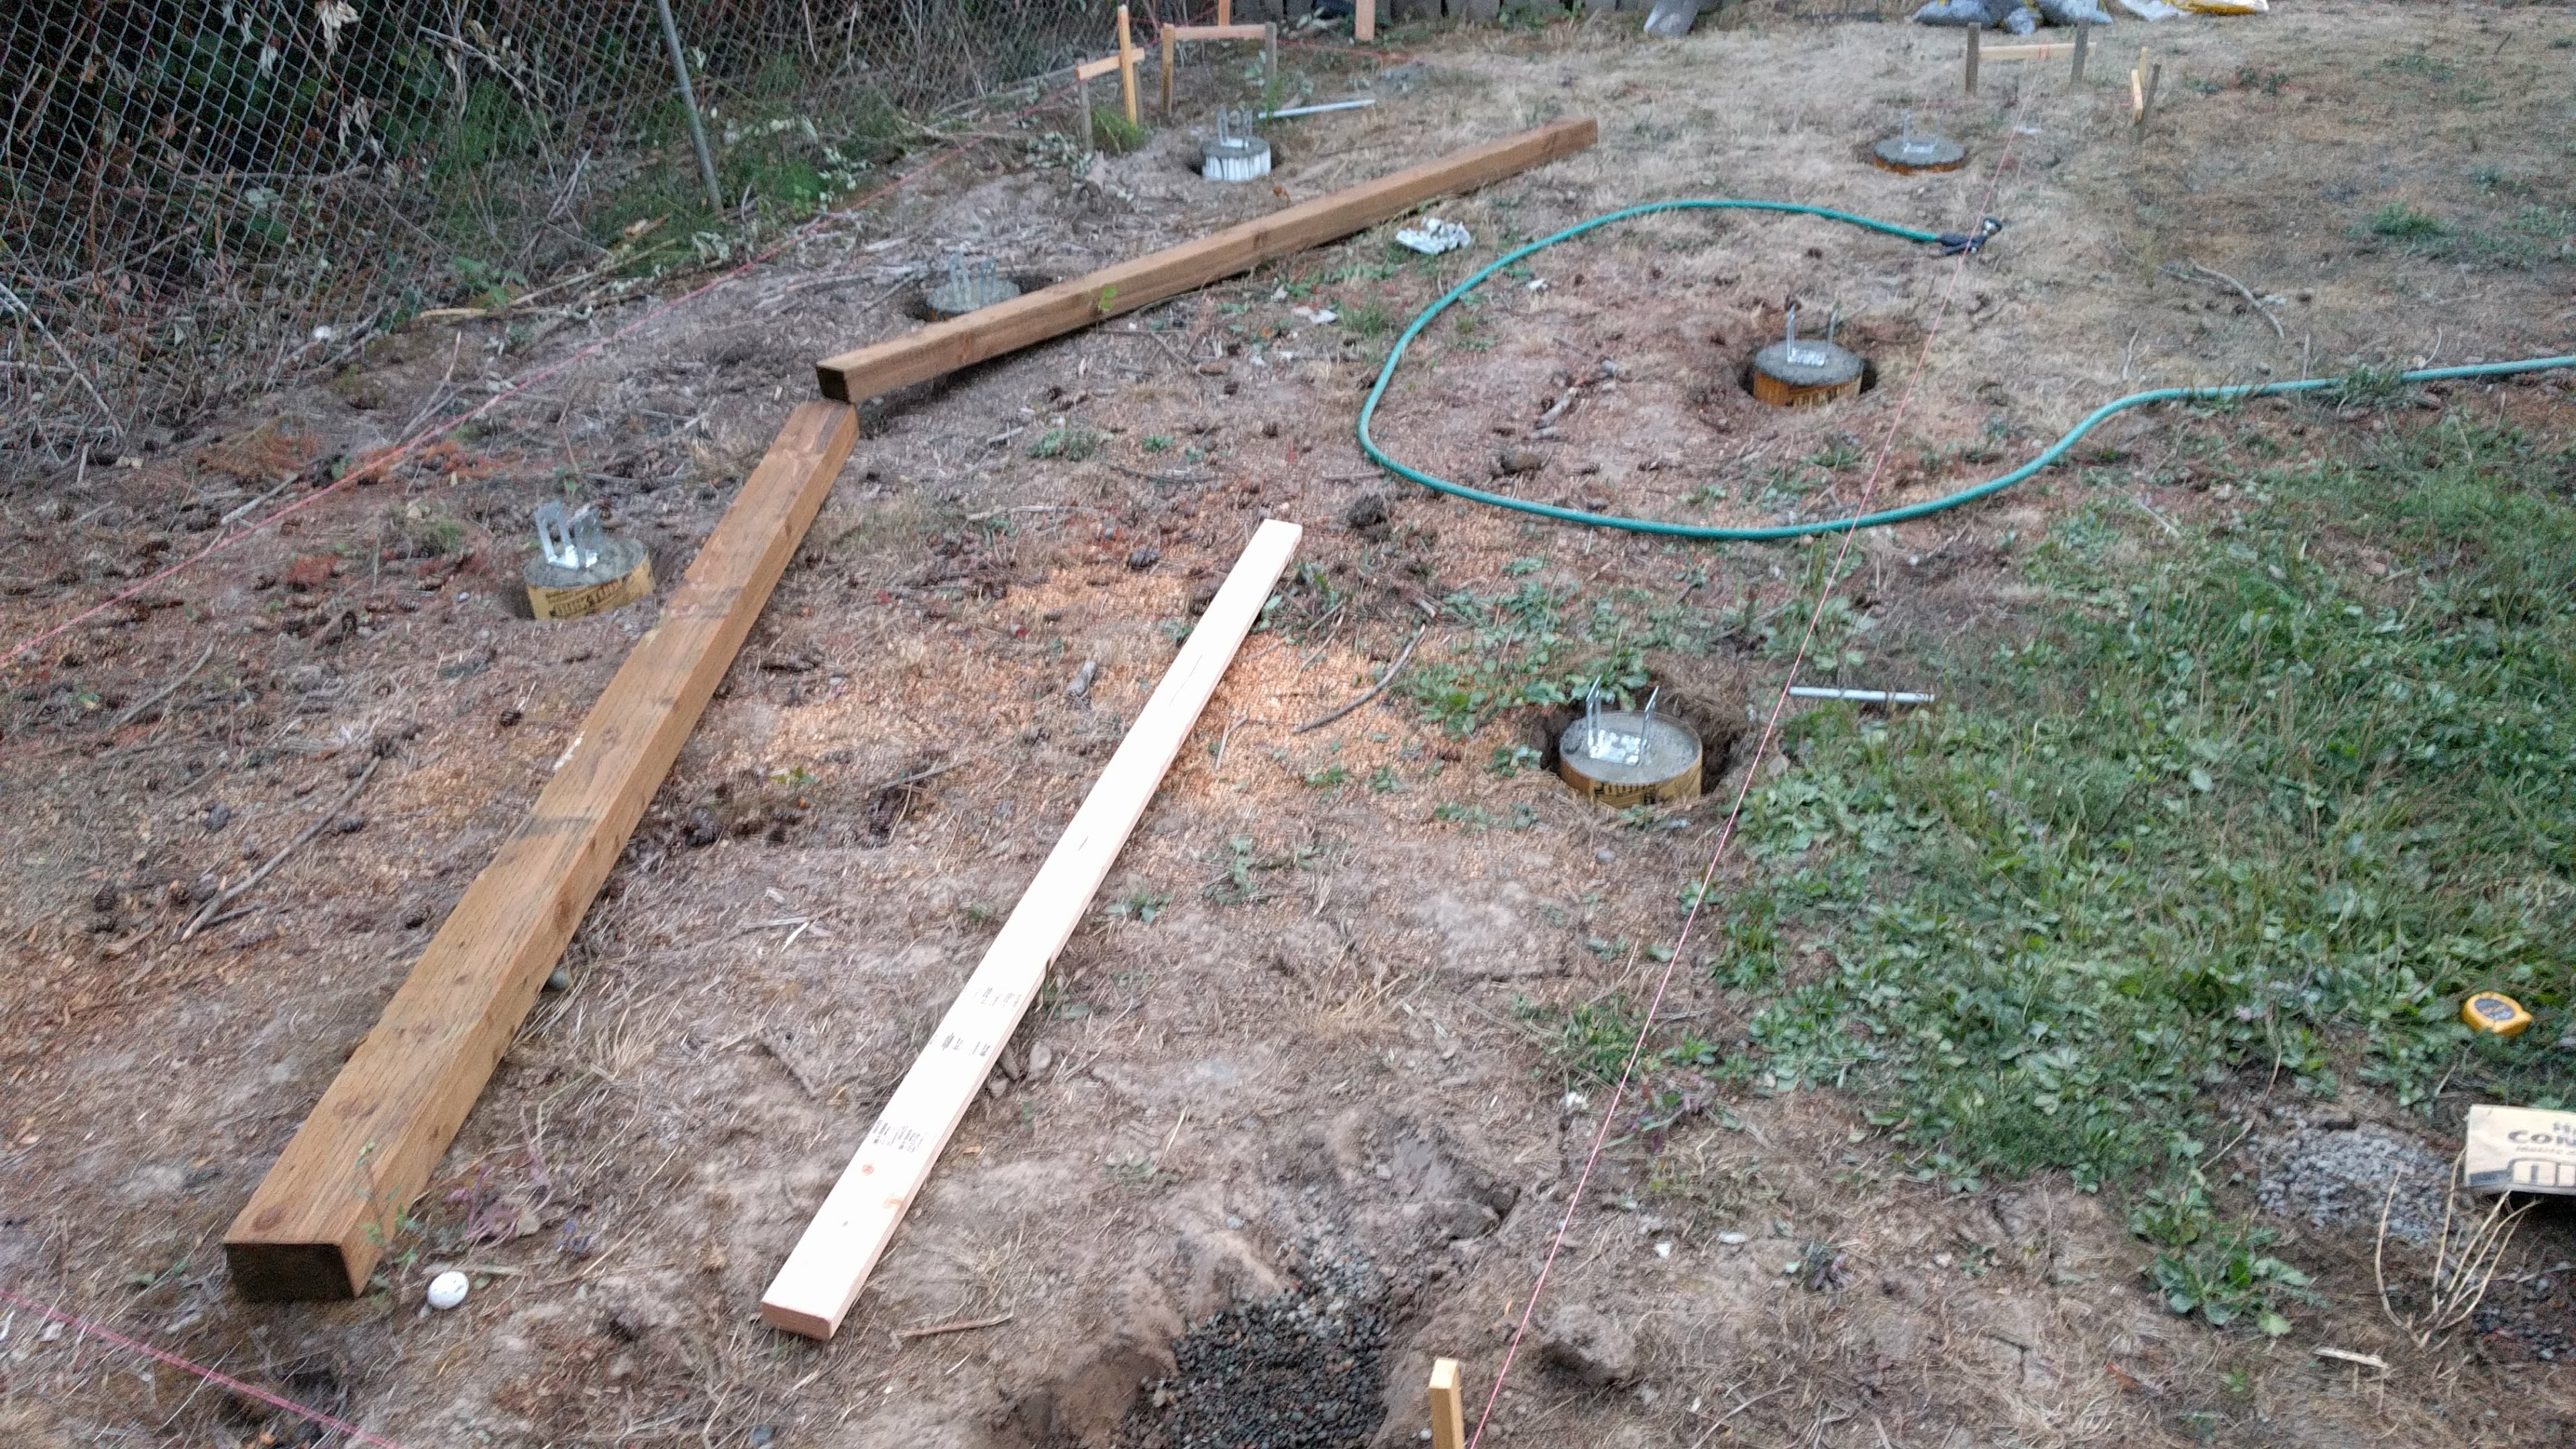
I used 10" diameter tubes but only went 18" deep. This would not be considered below the frost line for my area, but talking with coworkers it should be sufficent. Also: this is a shed, not a house.

2017-09-15 This picture captures the slope I'm building on. In one corner I actually excavated some dirt and put down some pea gravel where the beam would contact the ground. The opposite corner is over a foot off the ground.
This picture is taken three days after the the concrete was poured. I spent a whole evening trying to level the beams before realizing the 24in level I owned was inaccurate. NEVER USE THE YELLOW LEVELS FROM DOLLARTREE. When I discovered the yellow level would read differently when flipped over, I purchased the aluminum level and finished leveling in one evening.
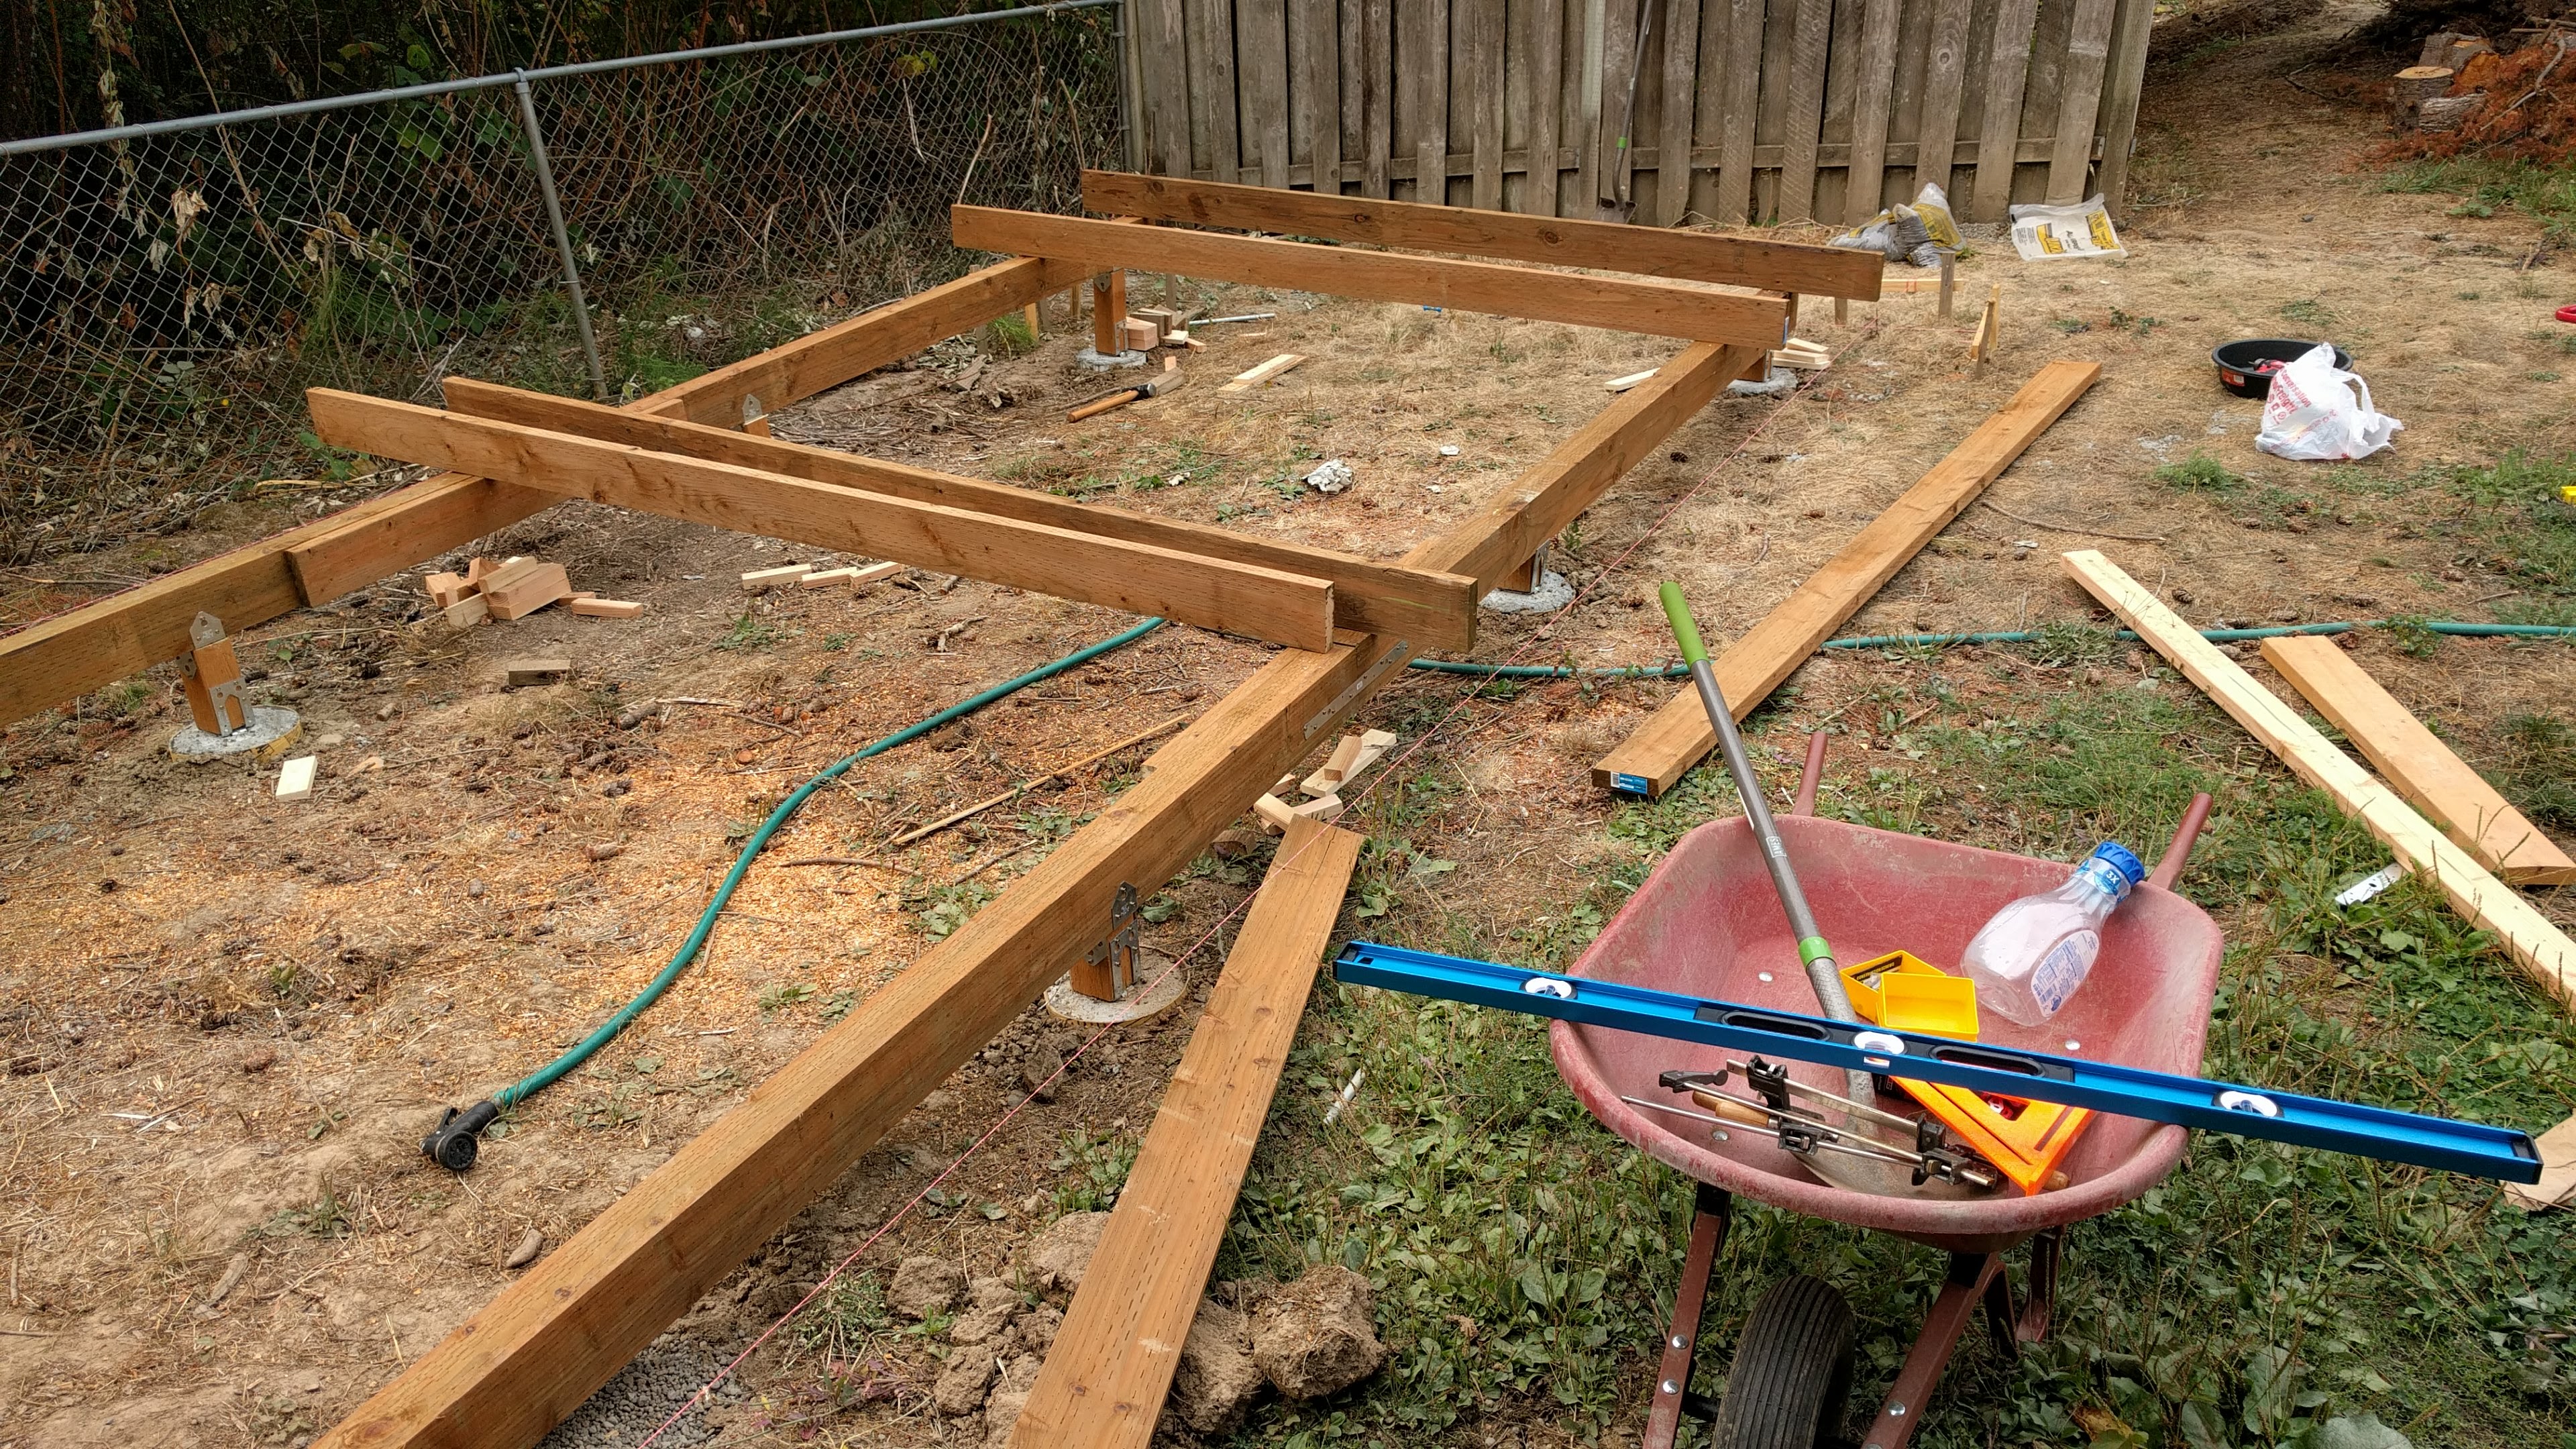
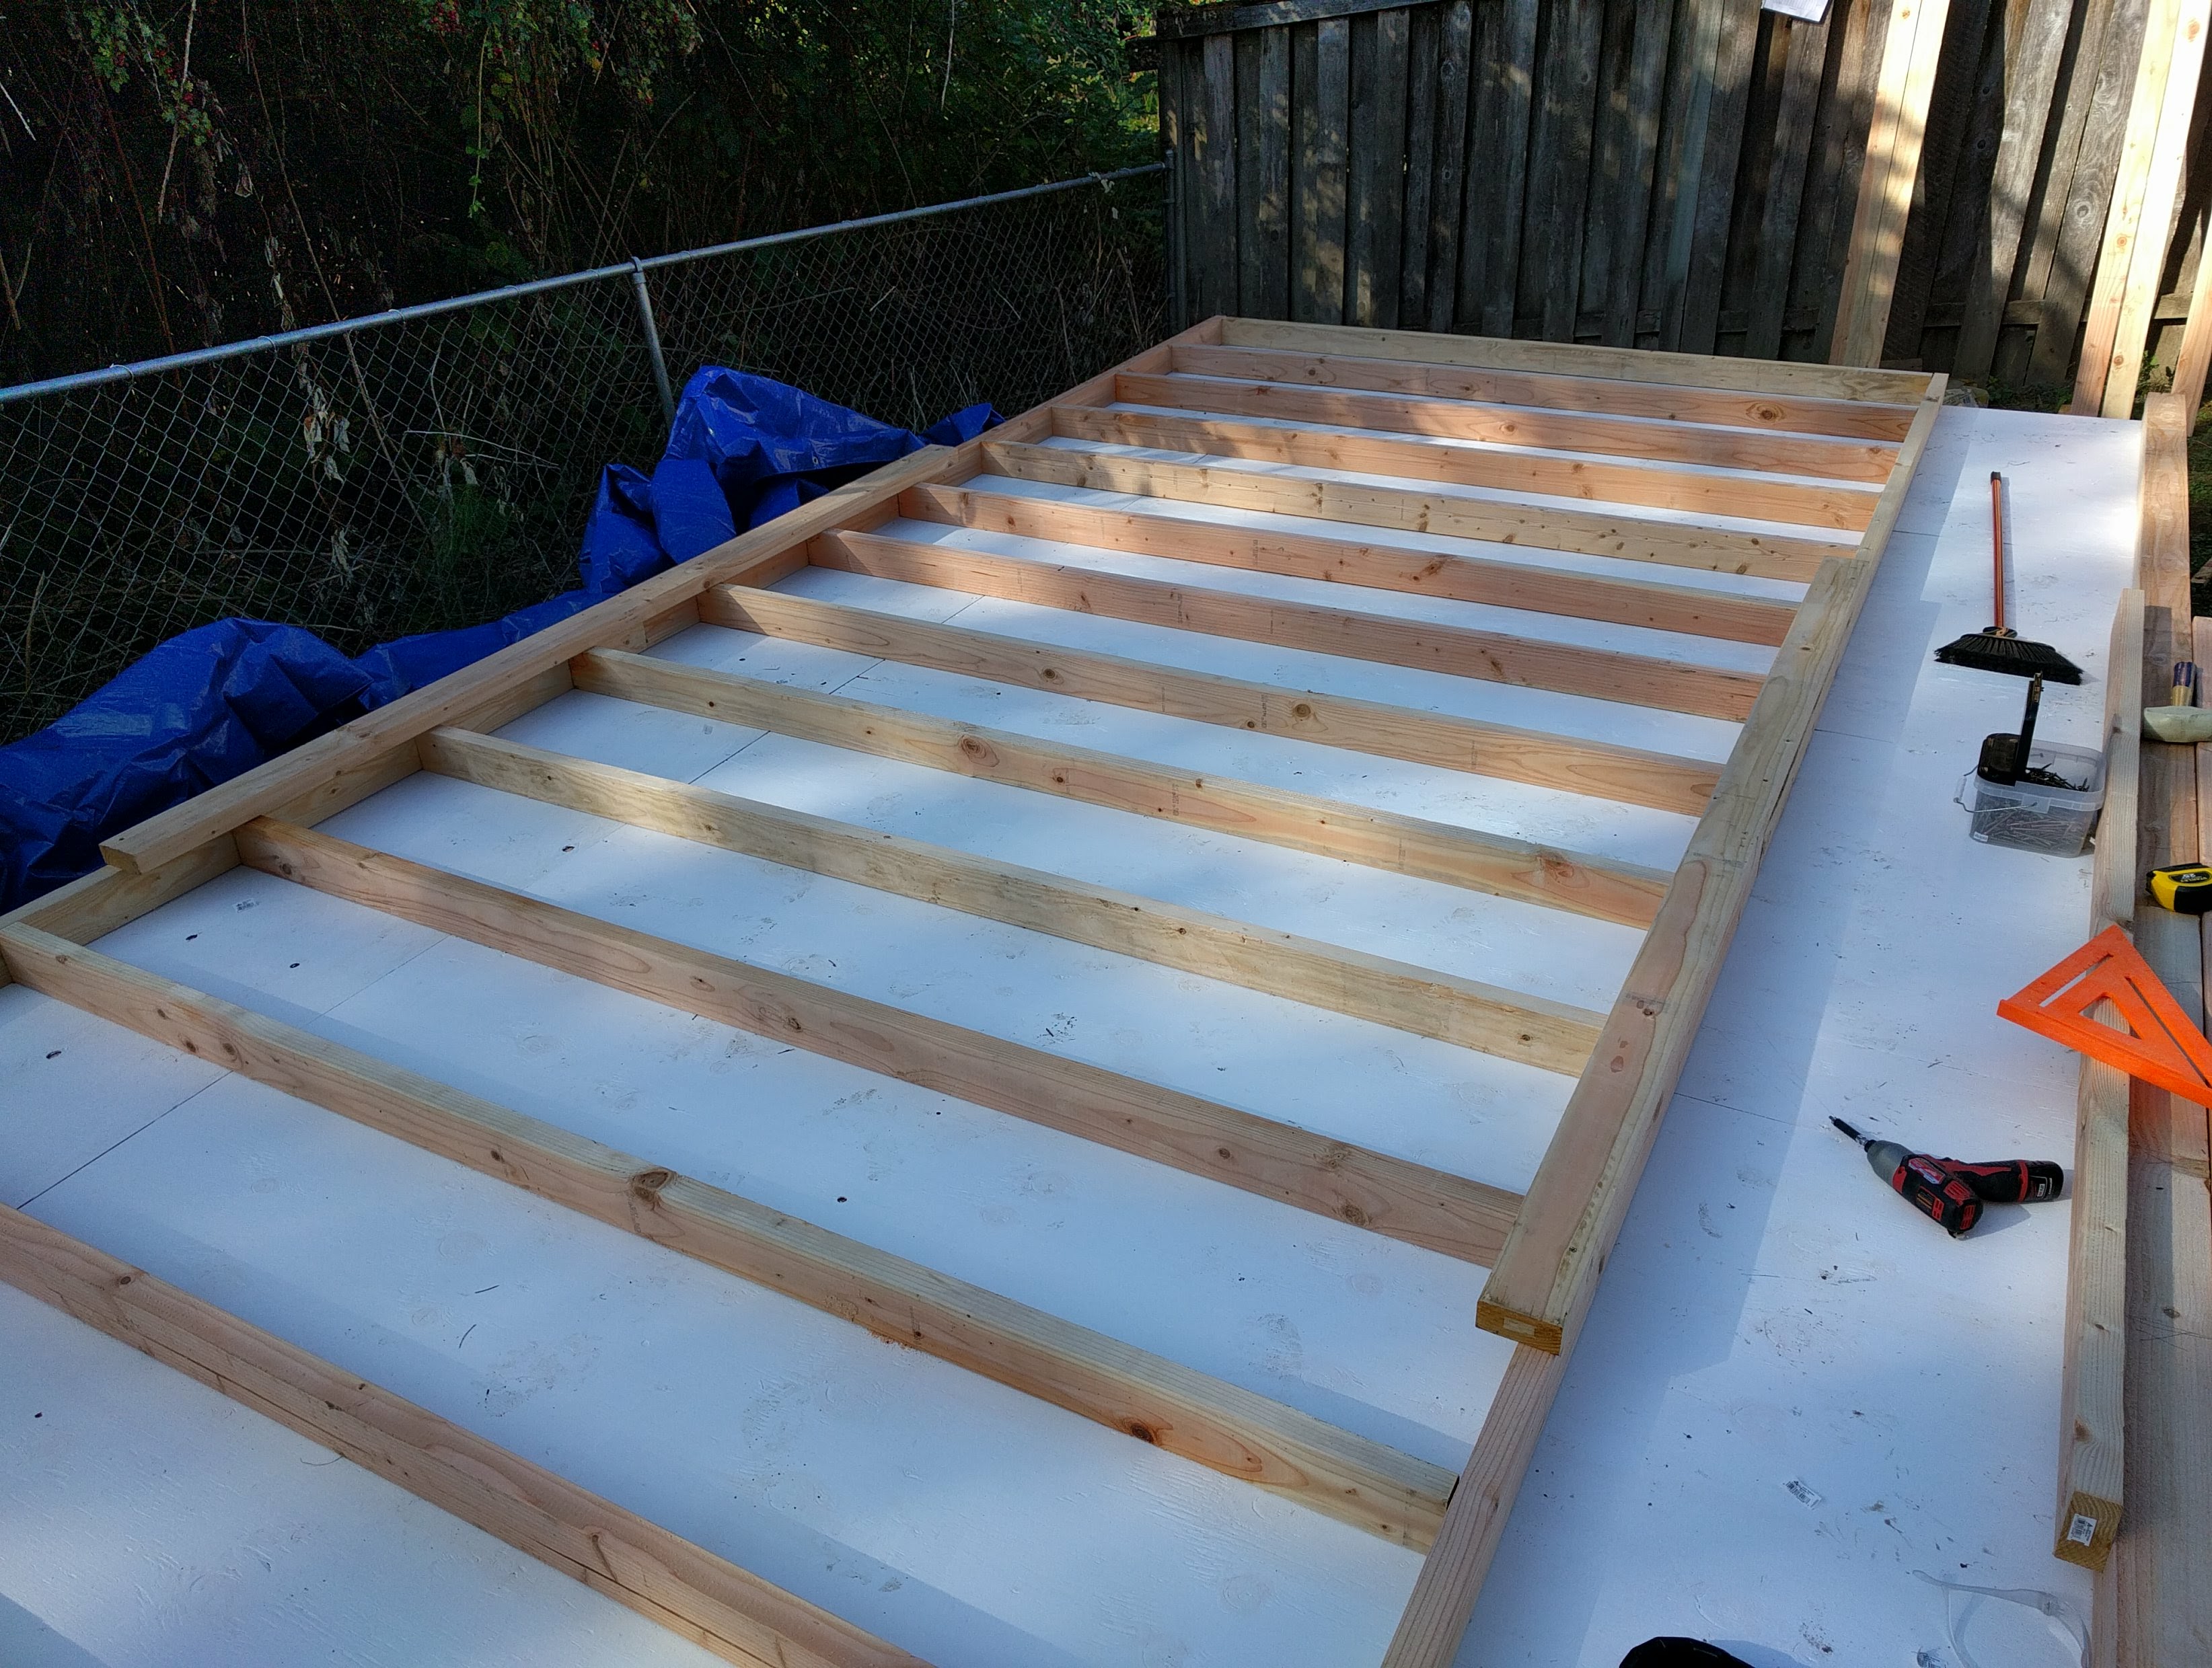
2017-09-16 I opted to use pressue treated 2x6 floor joists. As these boards will never contact the ground this is overkill, but the dollar difference is relatively small between pressure treated and bare boards.
Also seen in the picture is the 4x4 posts are now in-place holding the beams up. And the beams are tied together in the centre with a steel strap and 2x6 boards. That joint should not be load bearing but I hope that tie will help alleviate some creaks and shifting during the life of the structure.
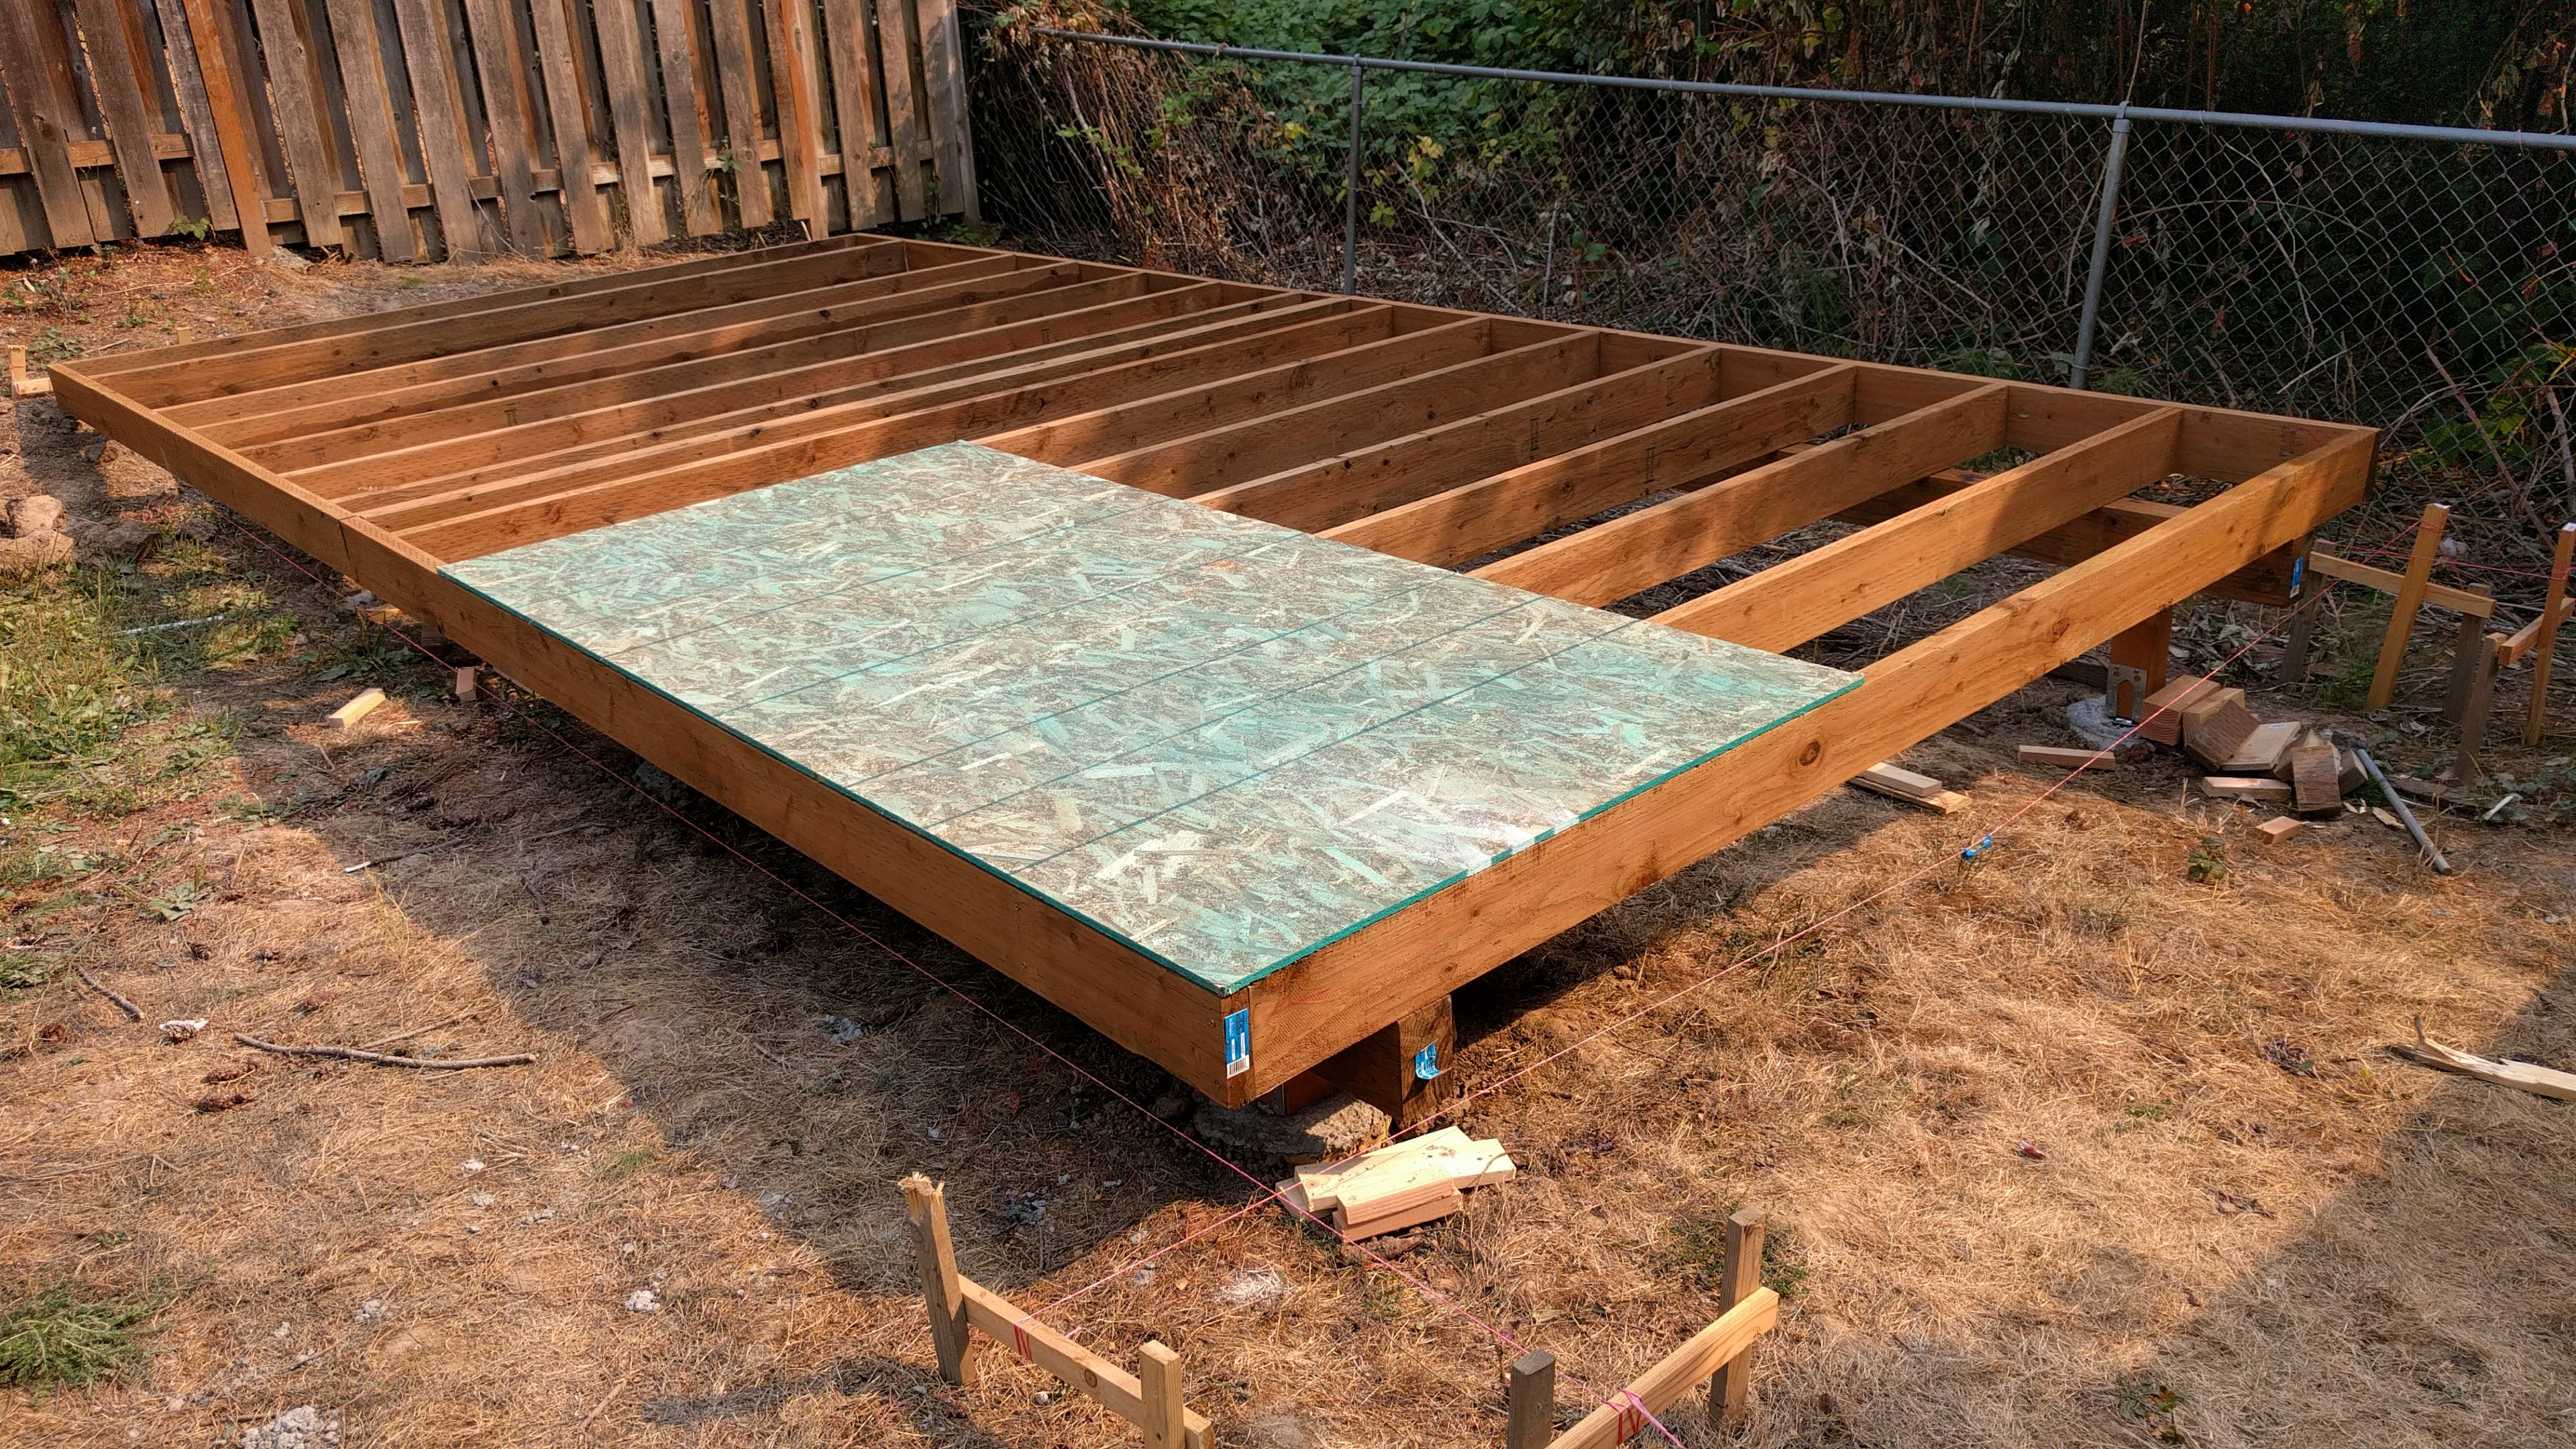
2017-09-16 All of the joists in place. I thought I was clever by using a piece of OSB I had in the garage to approximate square. I still checked by measuring the diaganols.
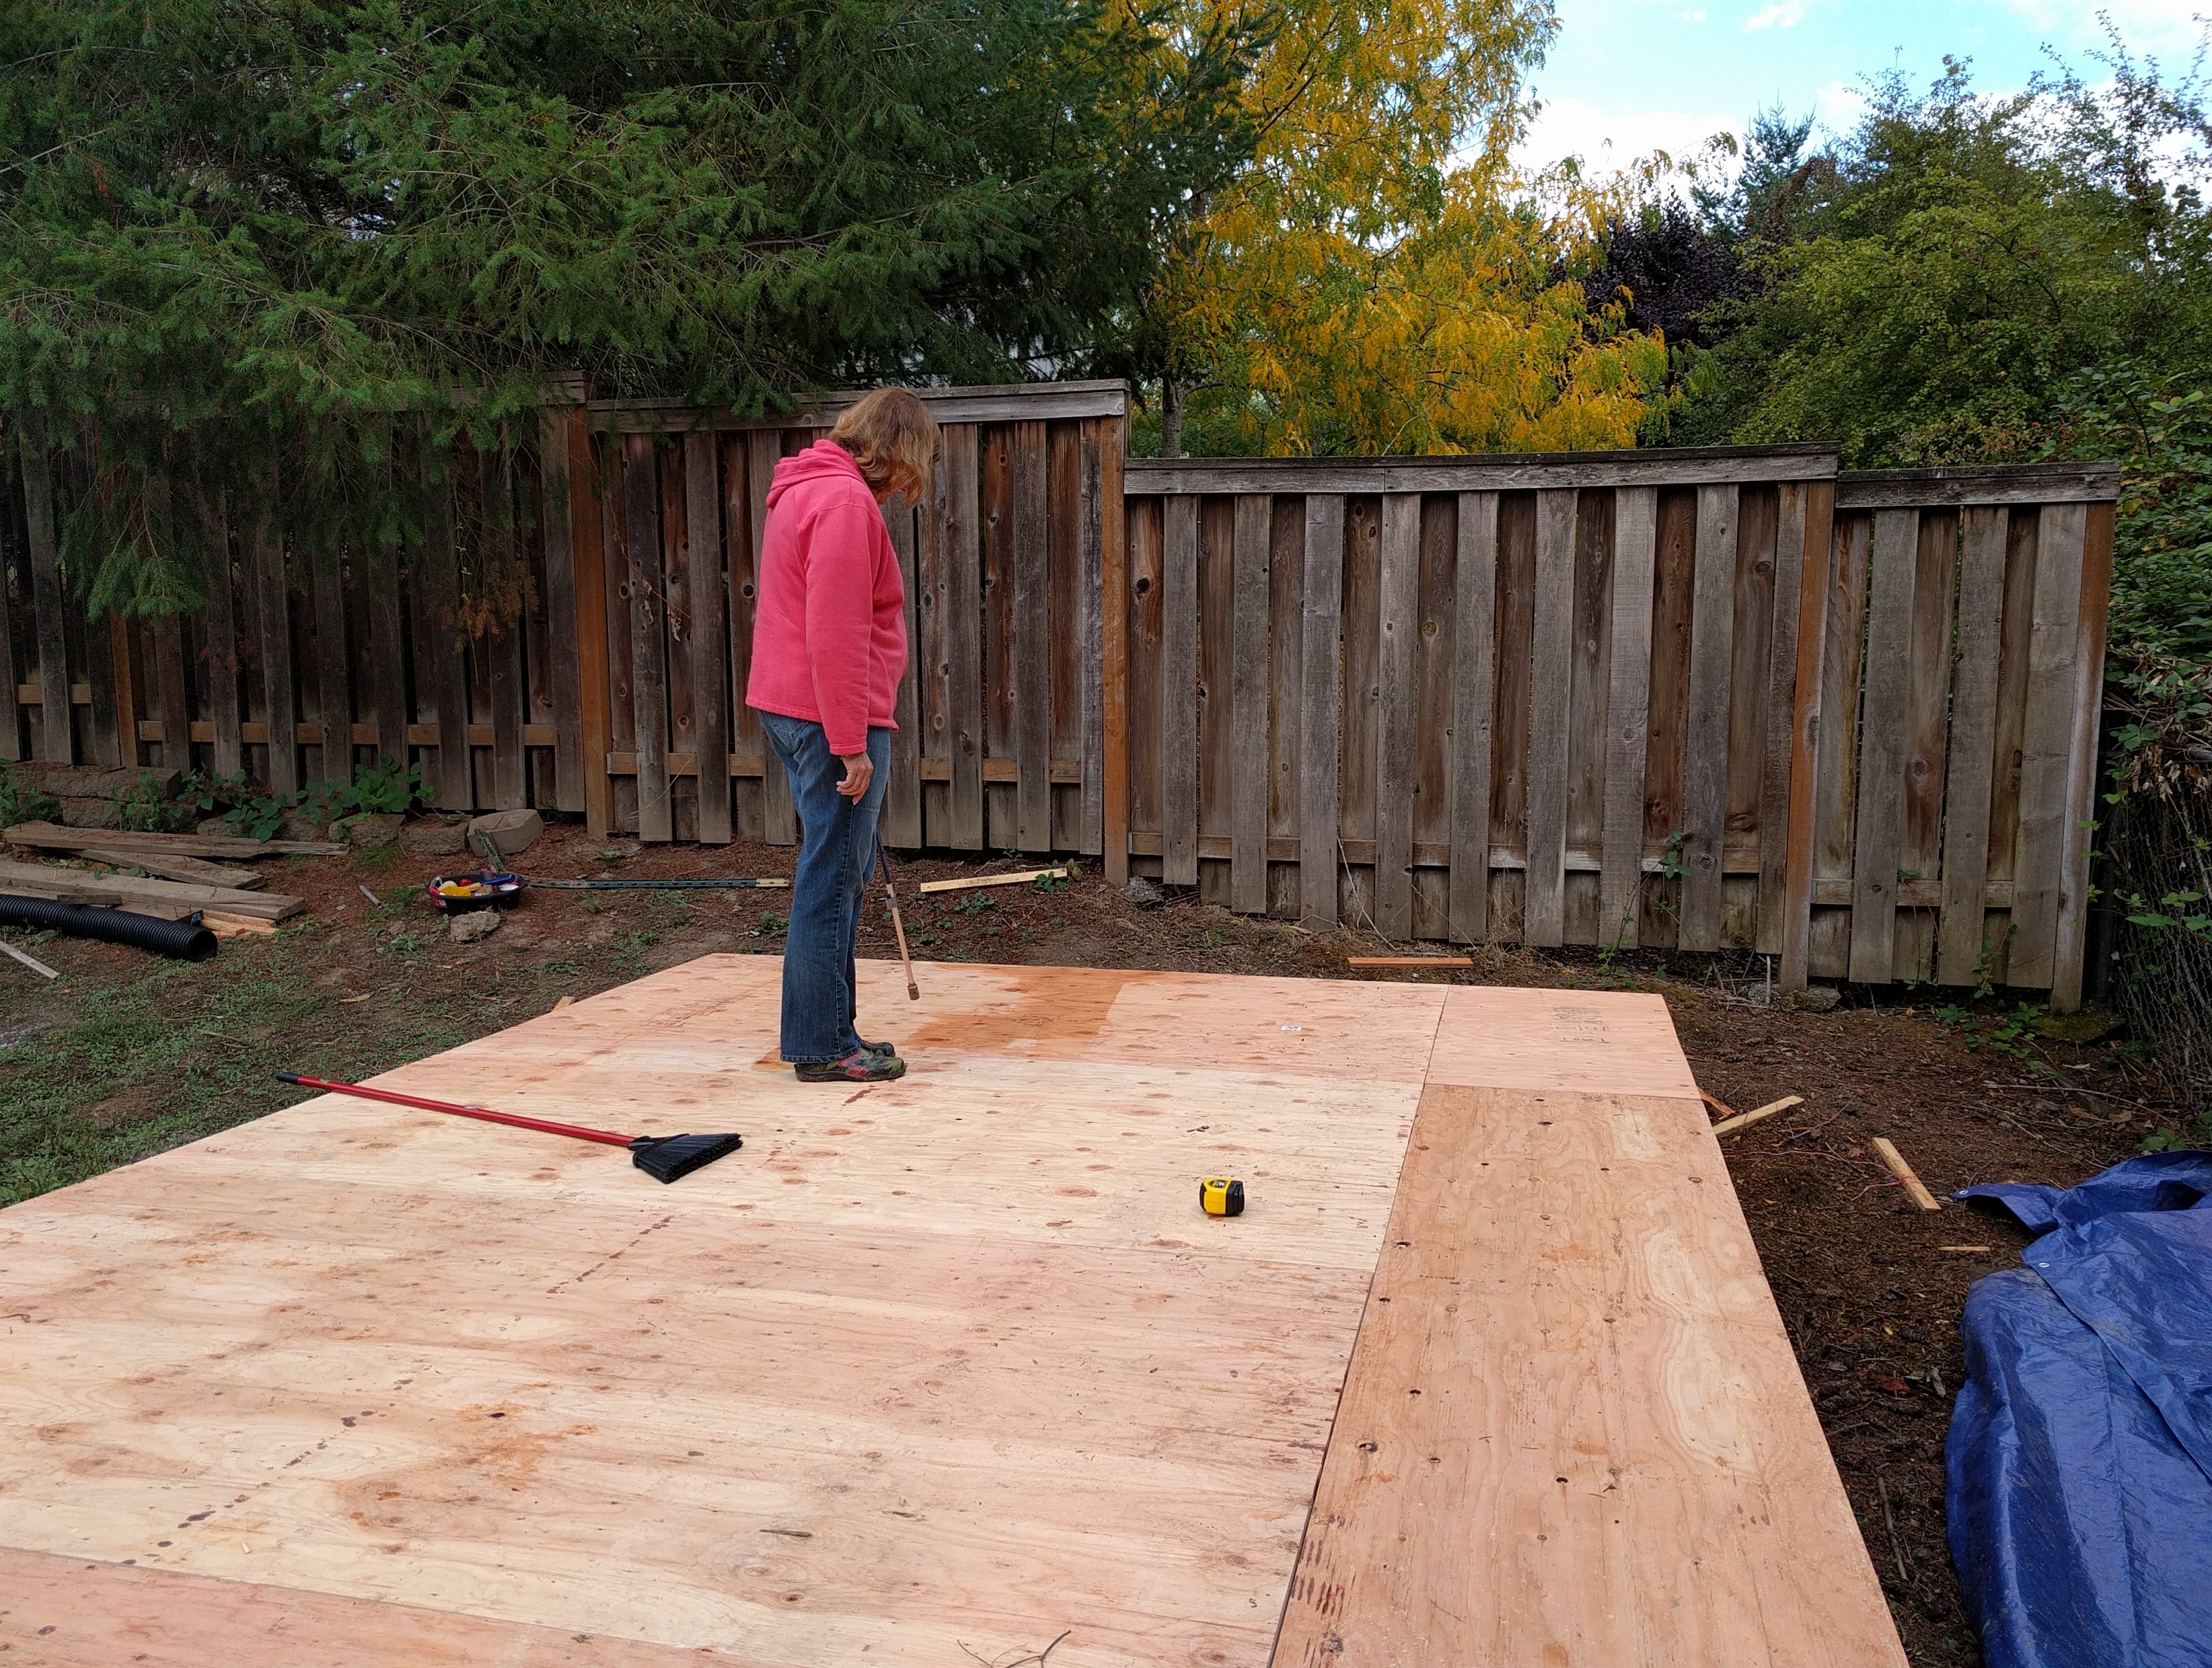
2017-09-29 I was able to get the flooring installed before Oregon's rains started, but the rains came soon after. Here my mother is using my flame weeder to dry the deck before we apply paint.
Putting Up Walls
I was able to build the foundation on my nights and weekends thanks to the lack of rain and relative robustness of unfinished decking. When it came time to turn my deck into a shed, I took a Friday off work and built most of the structure.
2017-09-30 Again, I'm joining two 10ft boards together to span the 20 foot shed. The boards in this picture are tempoary for standing up the wall, but I do reinforce the middle once the walls are up.

2017-10-03 The walls are up. While I used as many tricks as I could to make my life easier, this definately is not a one person job and I am thrilled my mother's visit coincided with this shed build.
Some quick learnings I experienced:
- There are some scrap wood screwed to the base. These help tip up the wall without the wall falling off the platform
- On the right side a diaganol brace is still visible. I would screw that board to the base so it could pivot upwards. Then, when the wall was lifted in place, my mother would steady the wall while I ran around with clamps and my impact driver to attach the wall to this board
- Pay attention to the bow of the board and keep all of the bows with the arch up
I do wish I watched a few more videos on building walls. While mine turned out well, I think it could have gone faster if I did more research
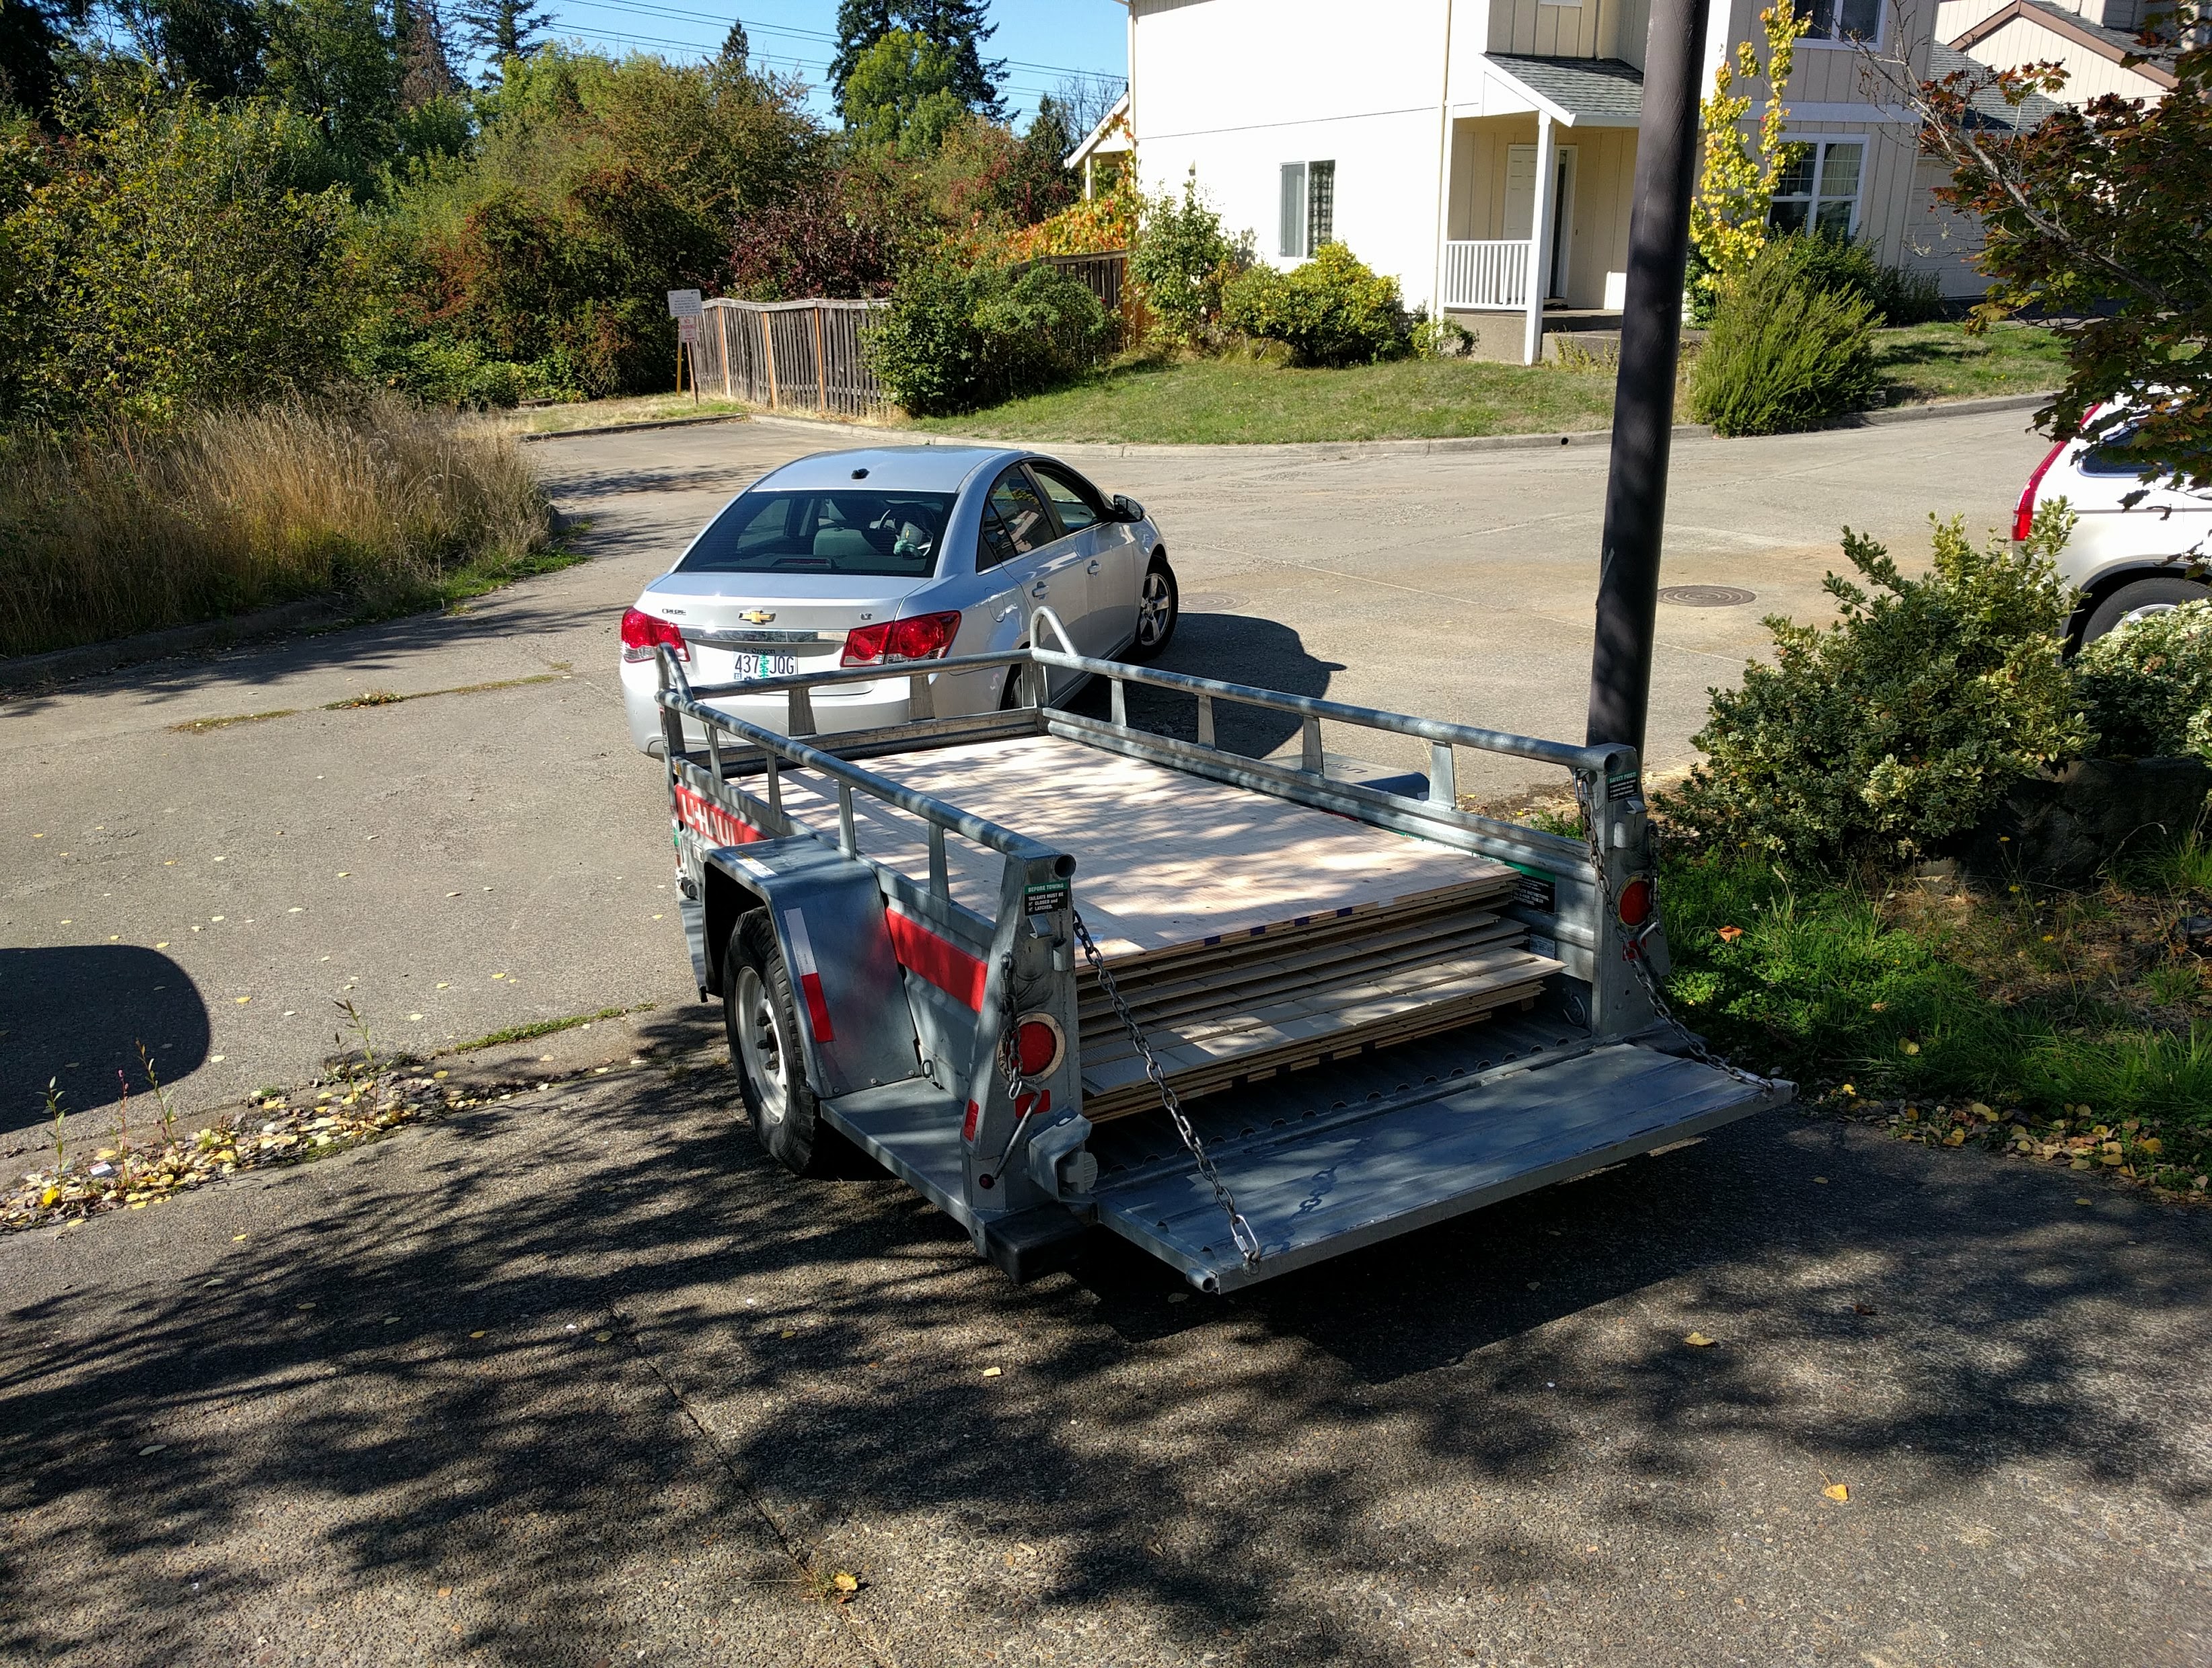
2017-10-03 This is the second of two trailer rentals required for this project: once for the flooring and once for the siding & roofing. There were many other trips to Home Depot, but boards can hand out my trunk.
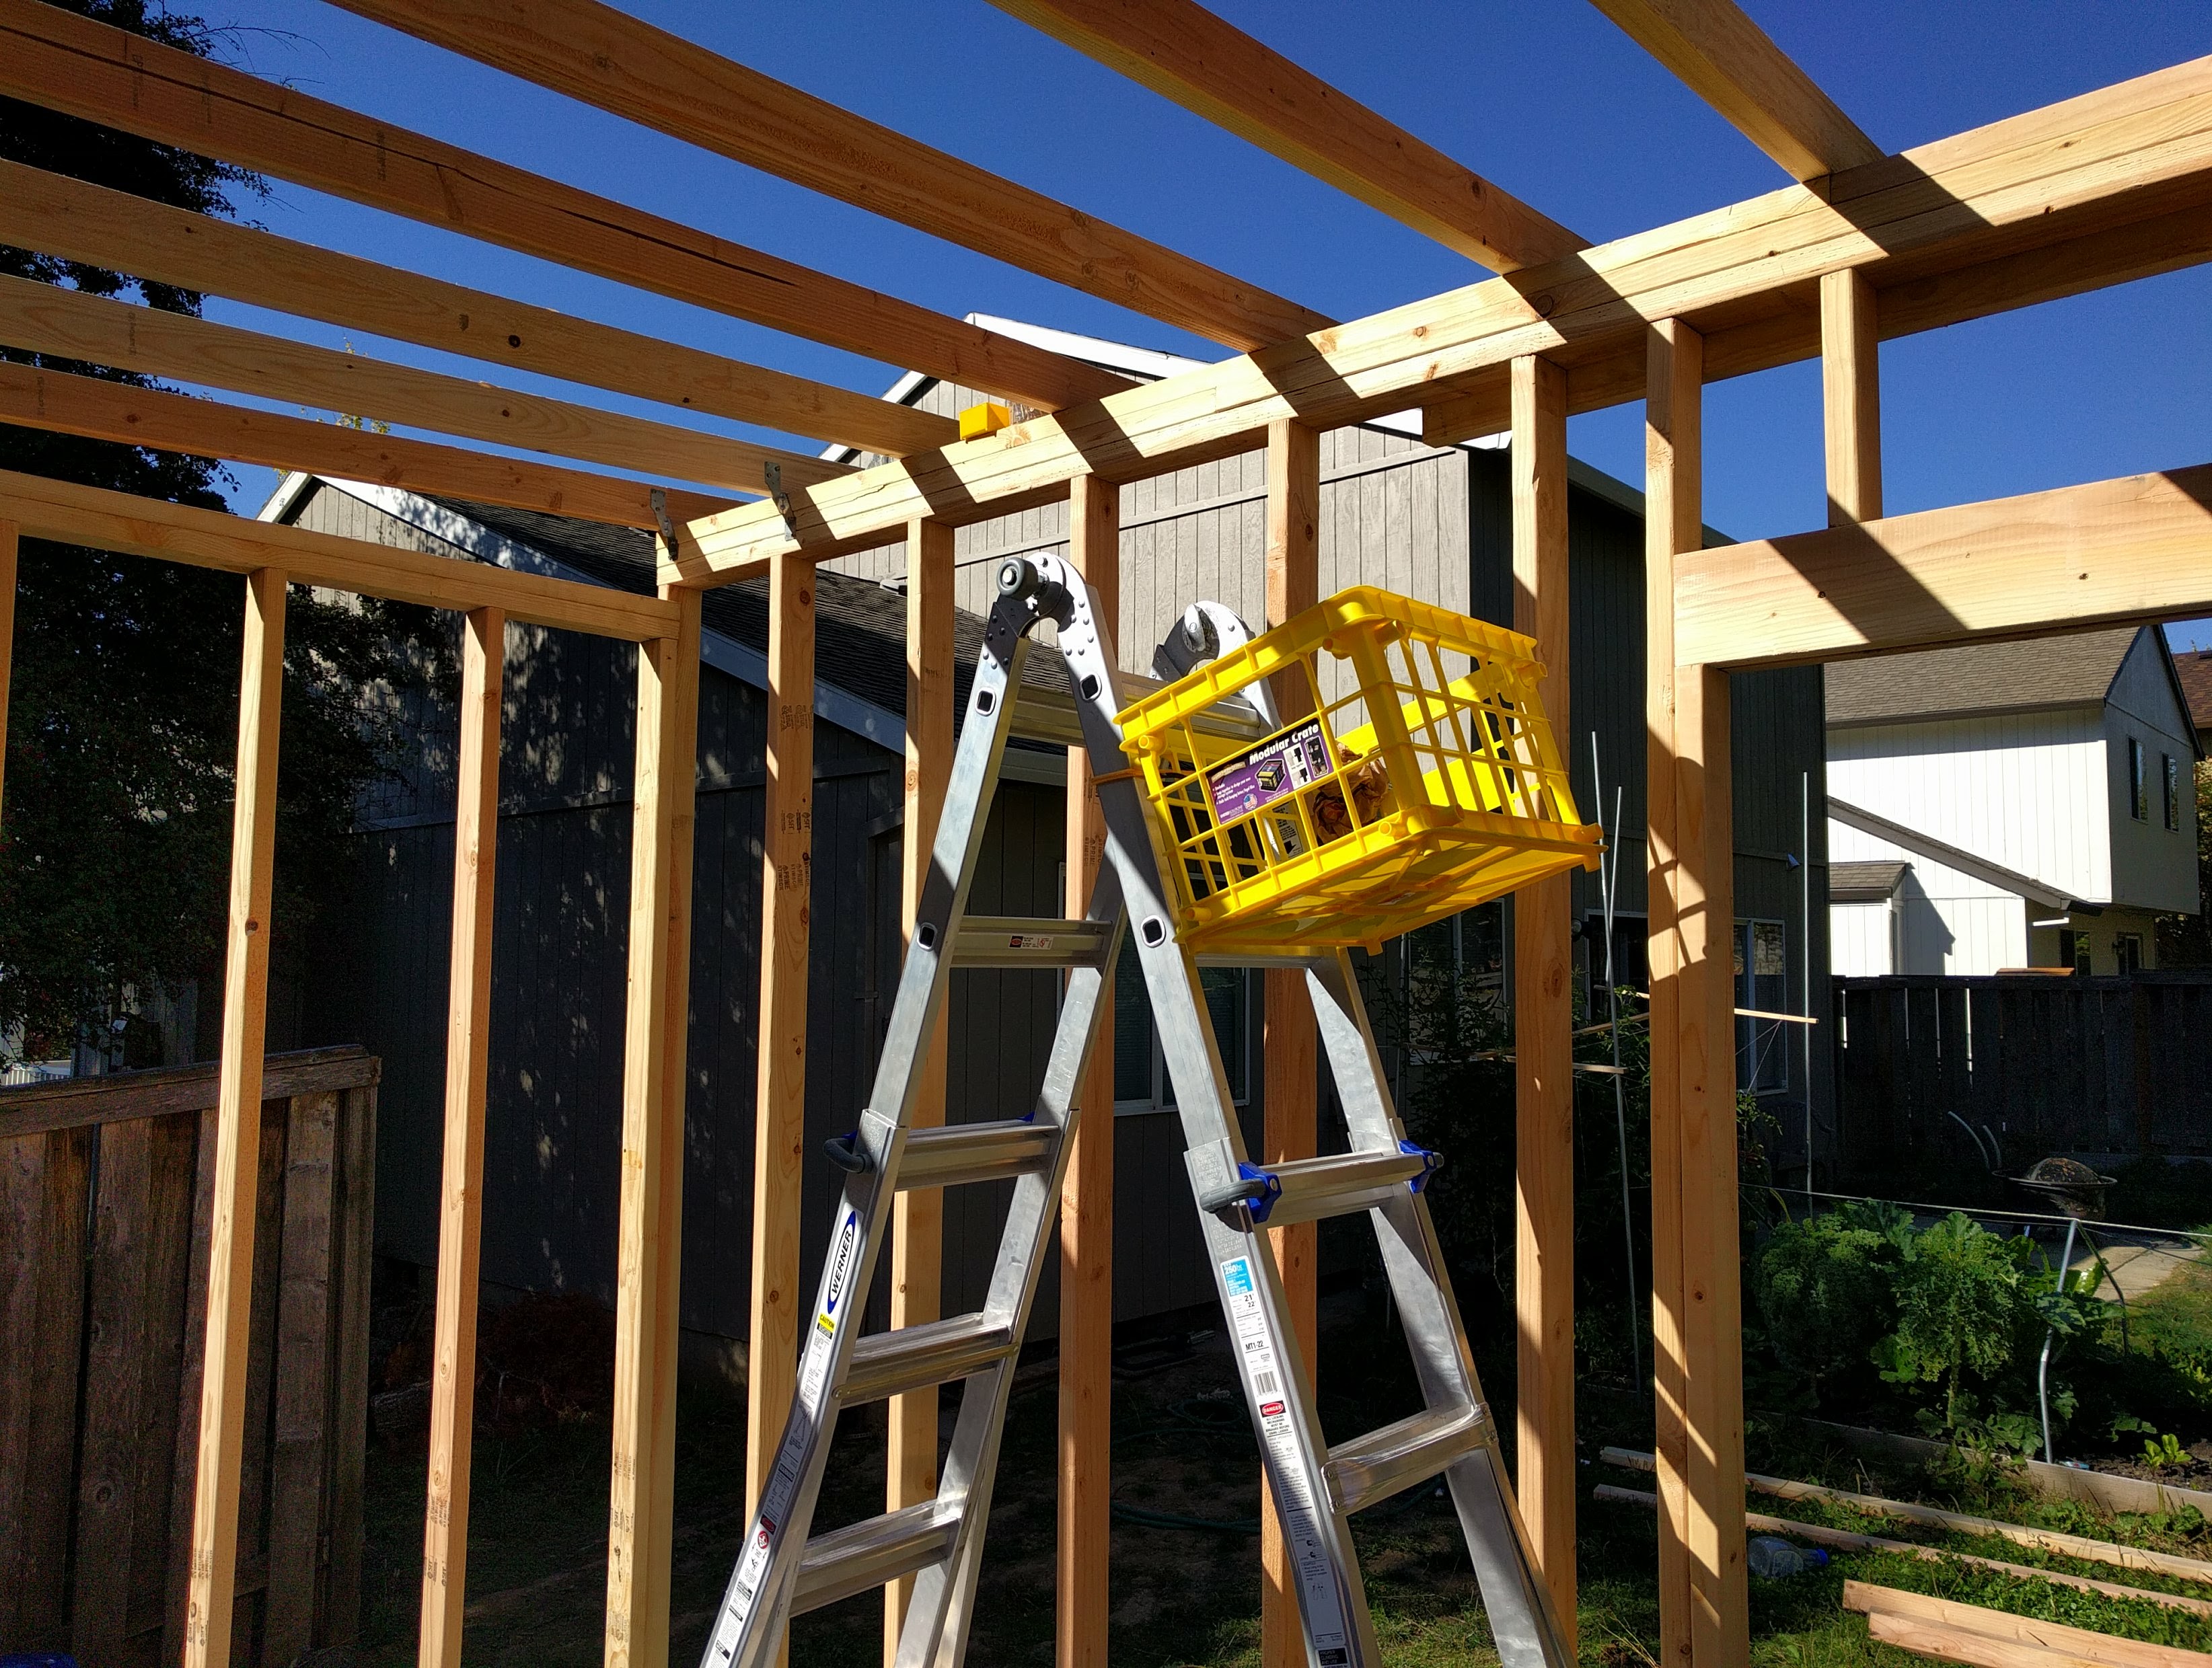
2017-10-03 I really like my multipurpose ladder, however it does not have a shelf like a step ladder. A crate and two bungee cords solved this problem.
Also seen in this picture is how I attached the ceiling joists with hurricane ties. I wanted to minimize the number of cuts performed as possible.
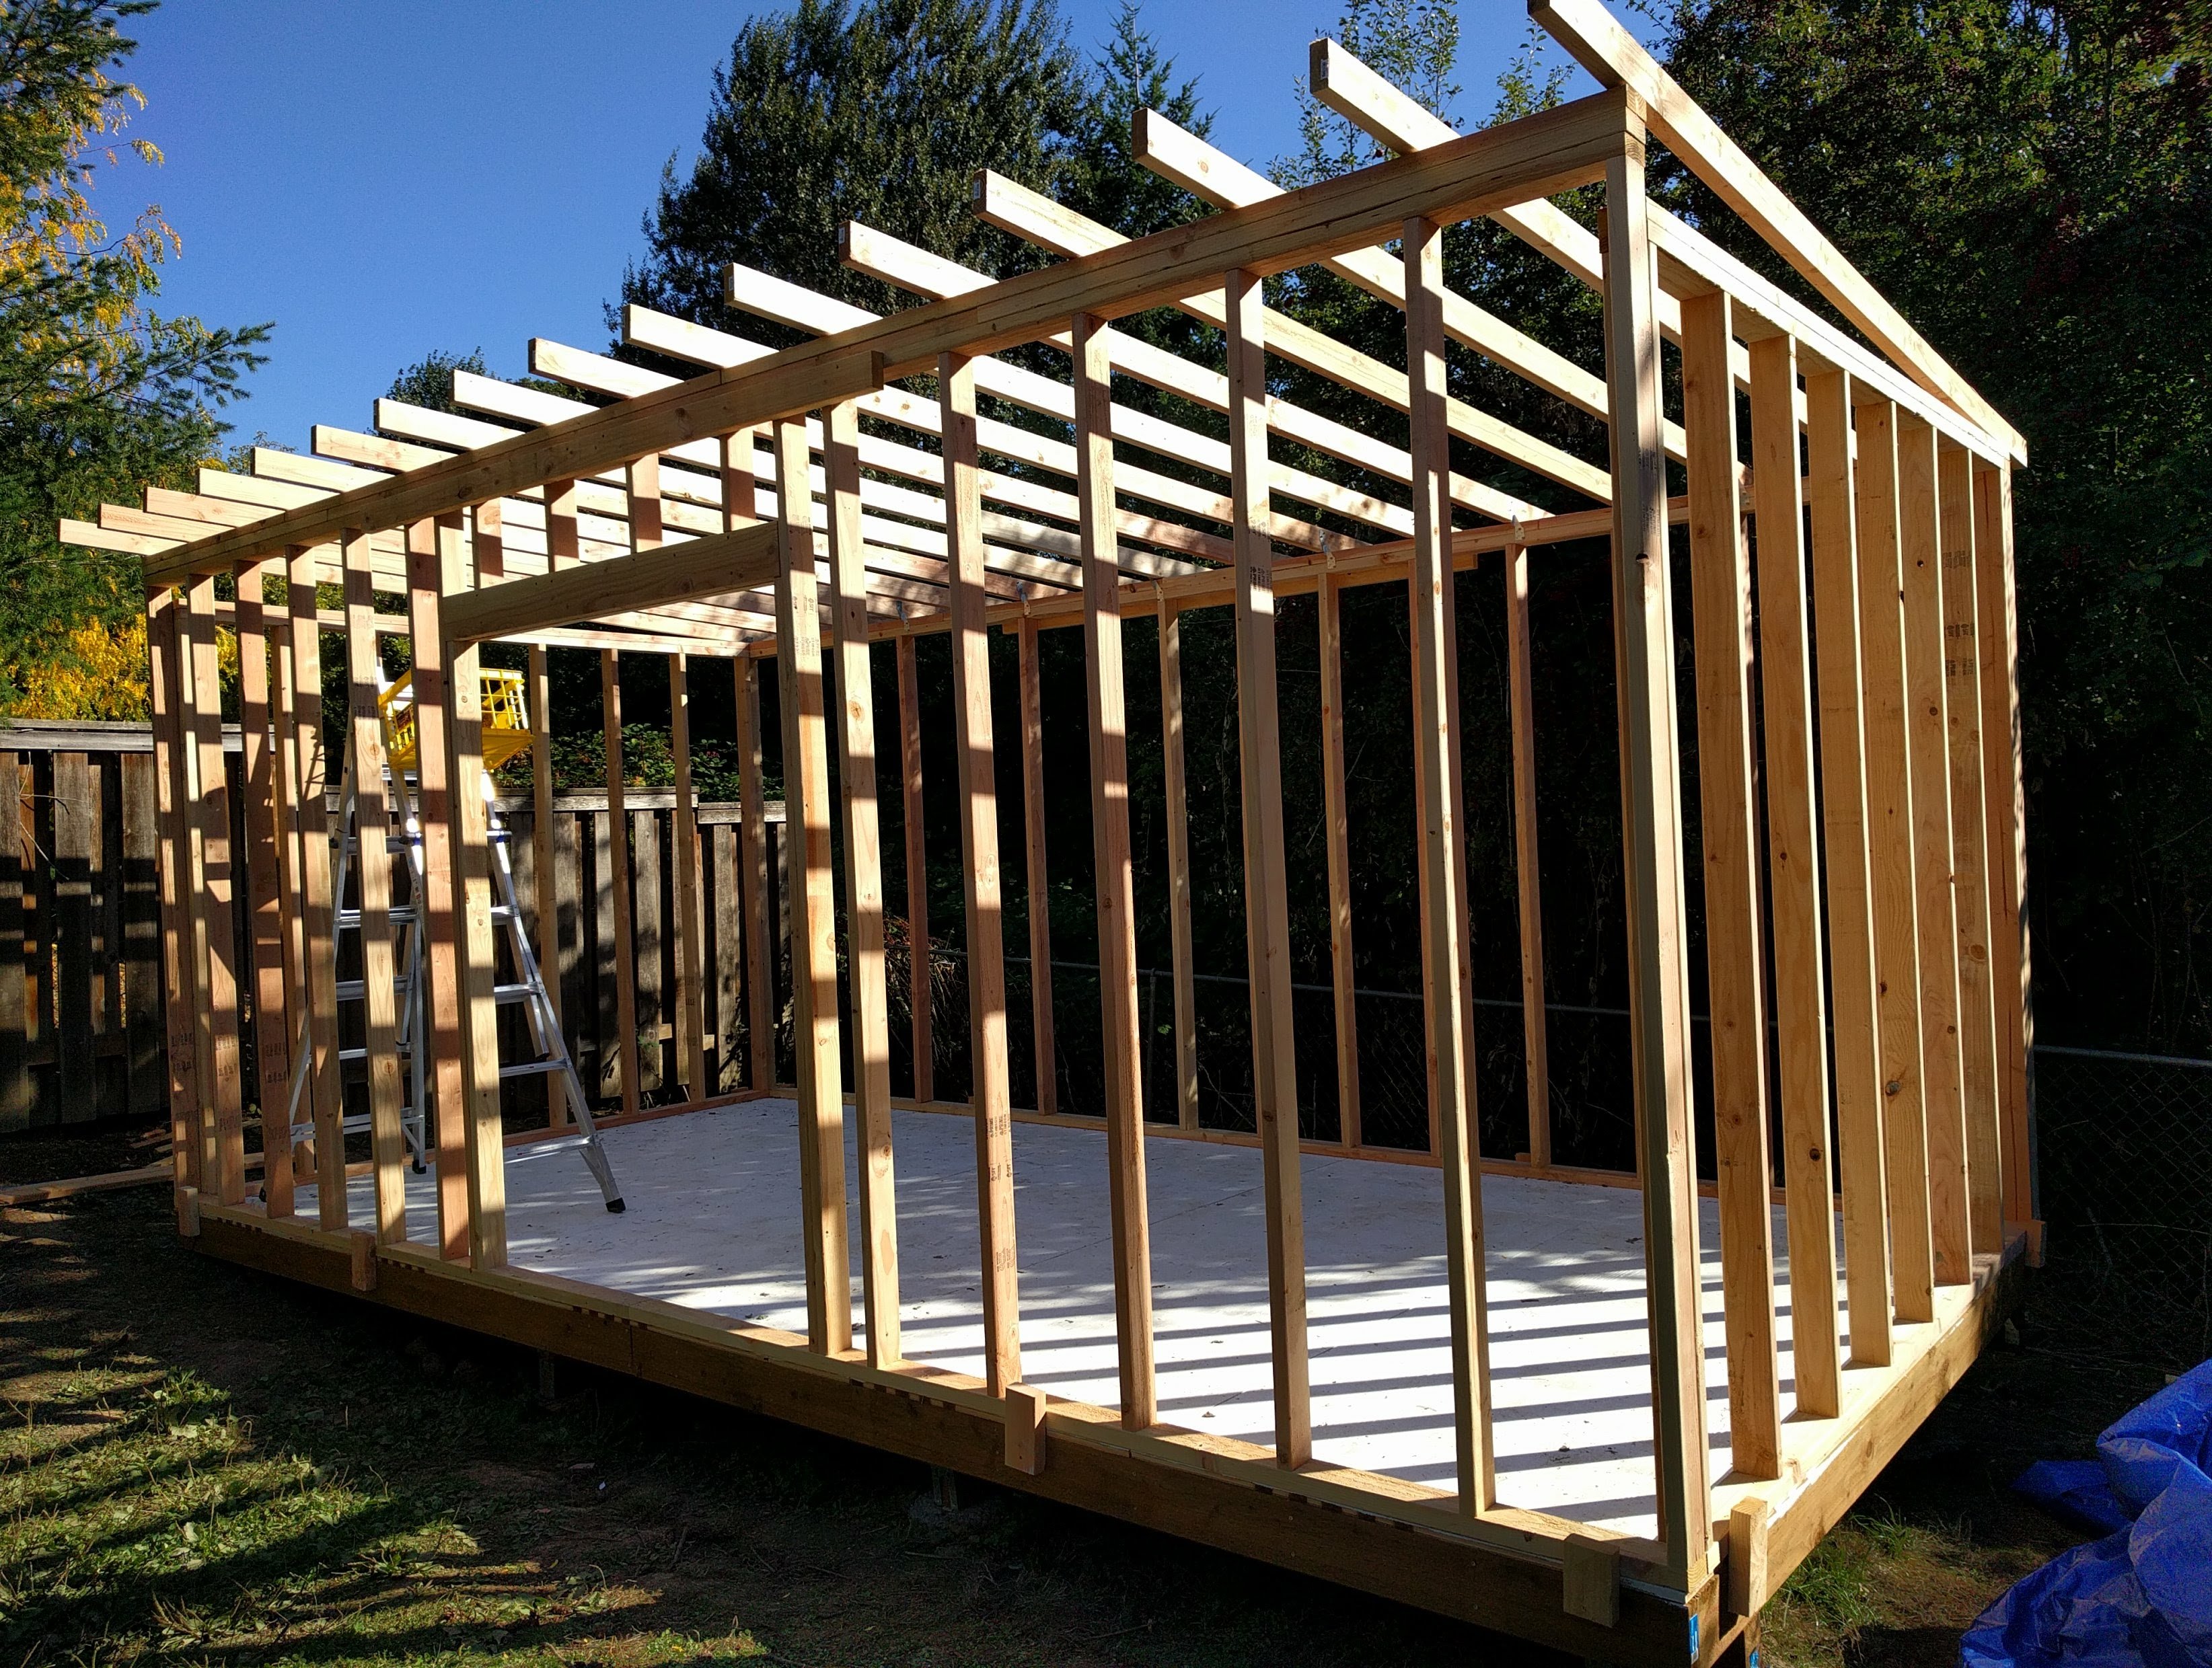
2017-10-03 All of the ceiling joists secured. I deviated from my plans on the roof in three major ways:
- I did not trim the joists back to be flush with the building. These are 2x12 boards allowing for about one foot overhang on the front and rear of the shed
- The roof is low slope. While my plans called for shorter walls, to minimize cuts I kept the three walls to use full 92in board. This also provides more interior space
- My roof is 16" on centre instead of 24". Given my choice for a low slope roof, I was more nervious about the roof load capacity. Also, 2x4 boards are around six dollars each, so that addition was a minimal cost increase
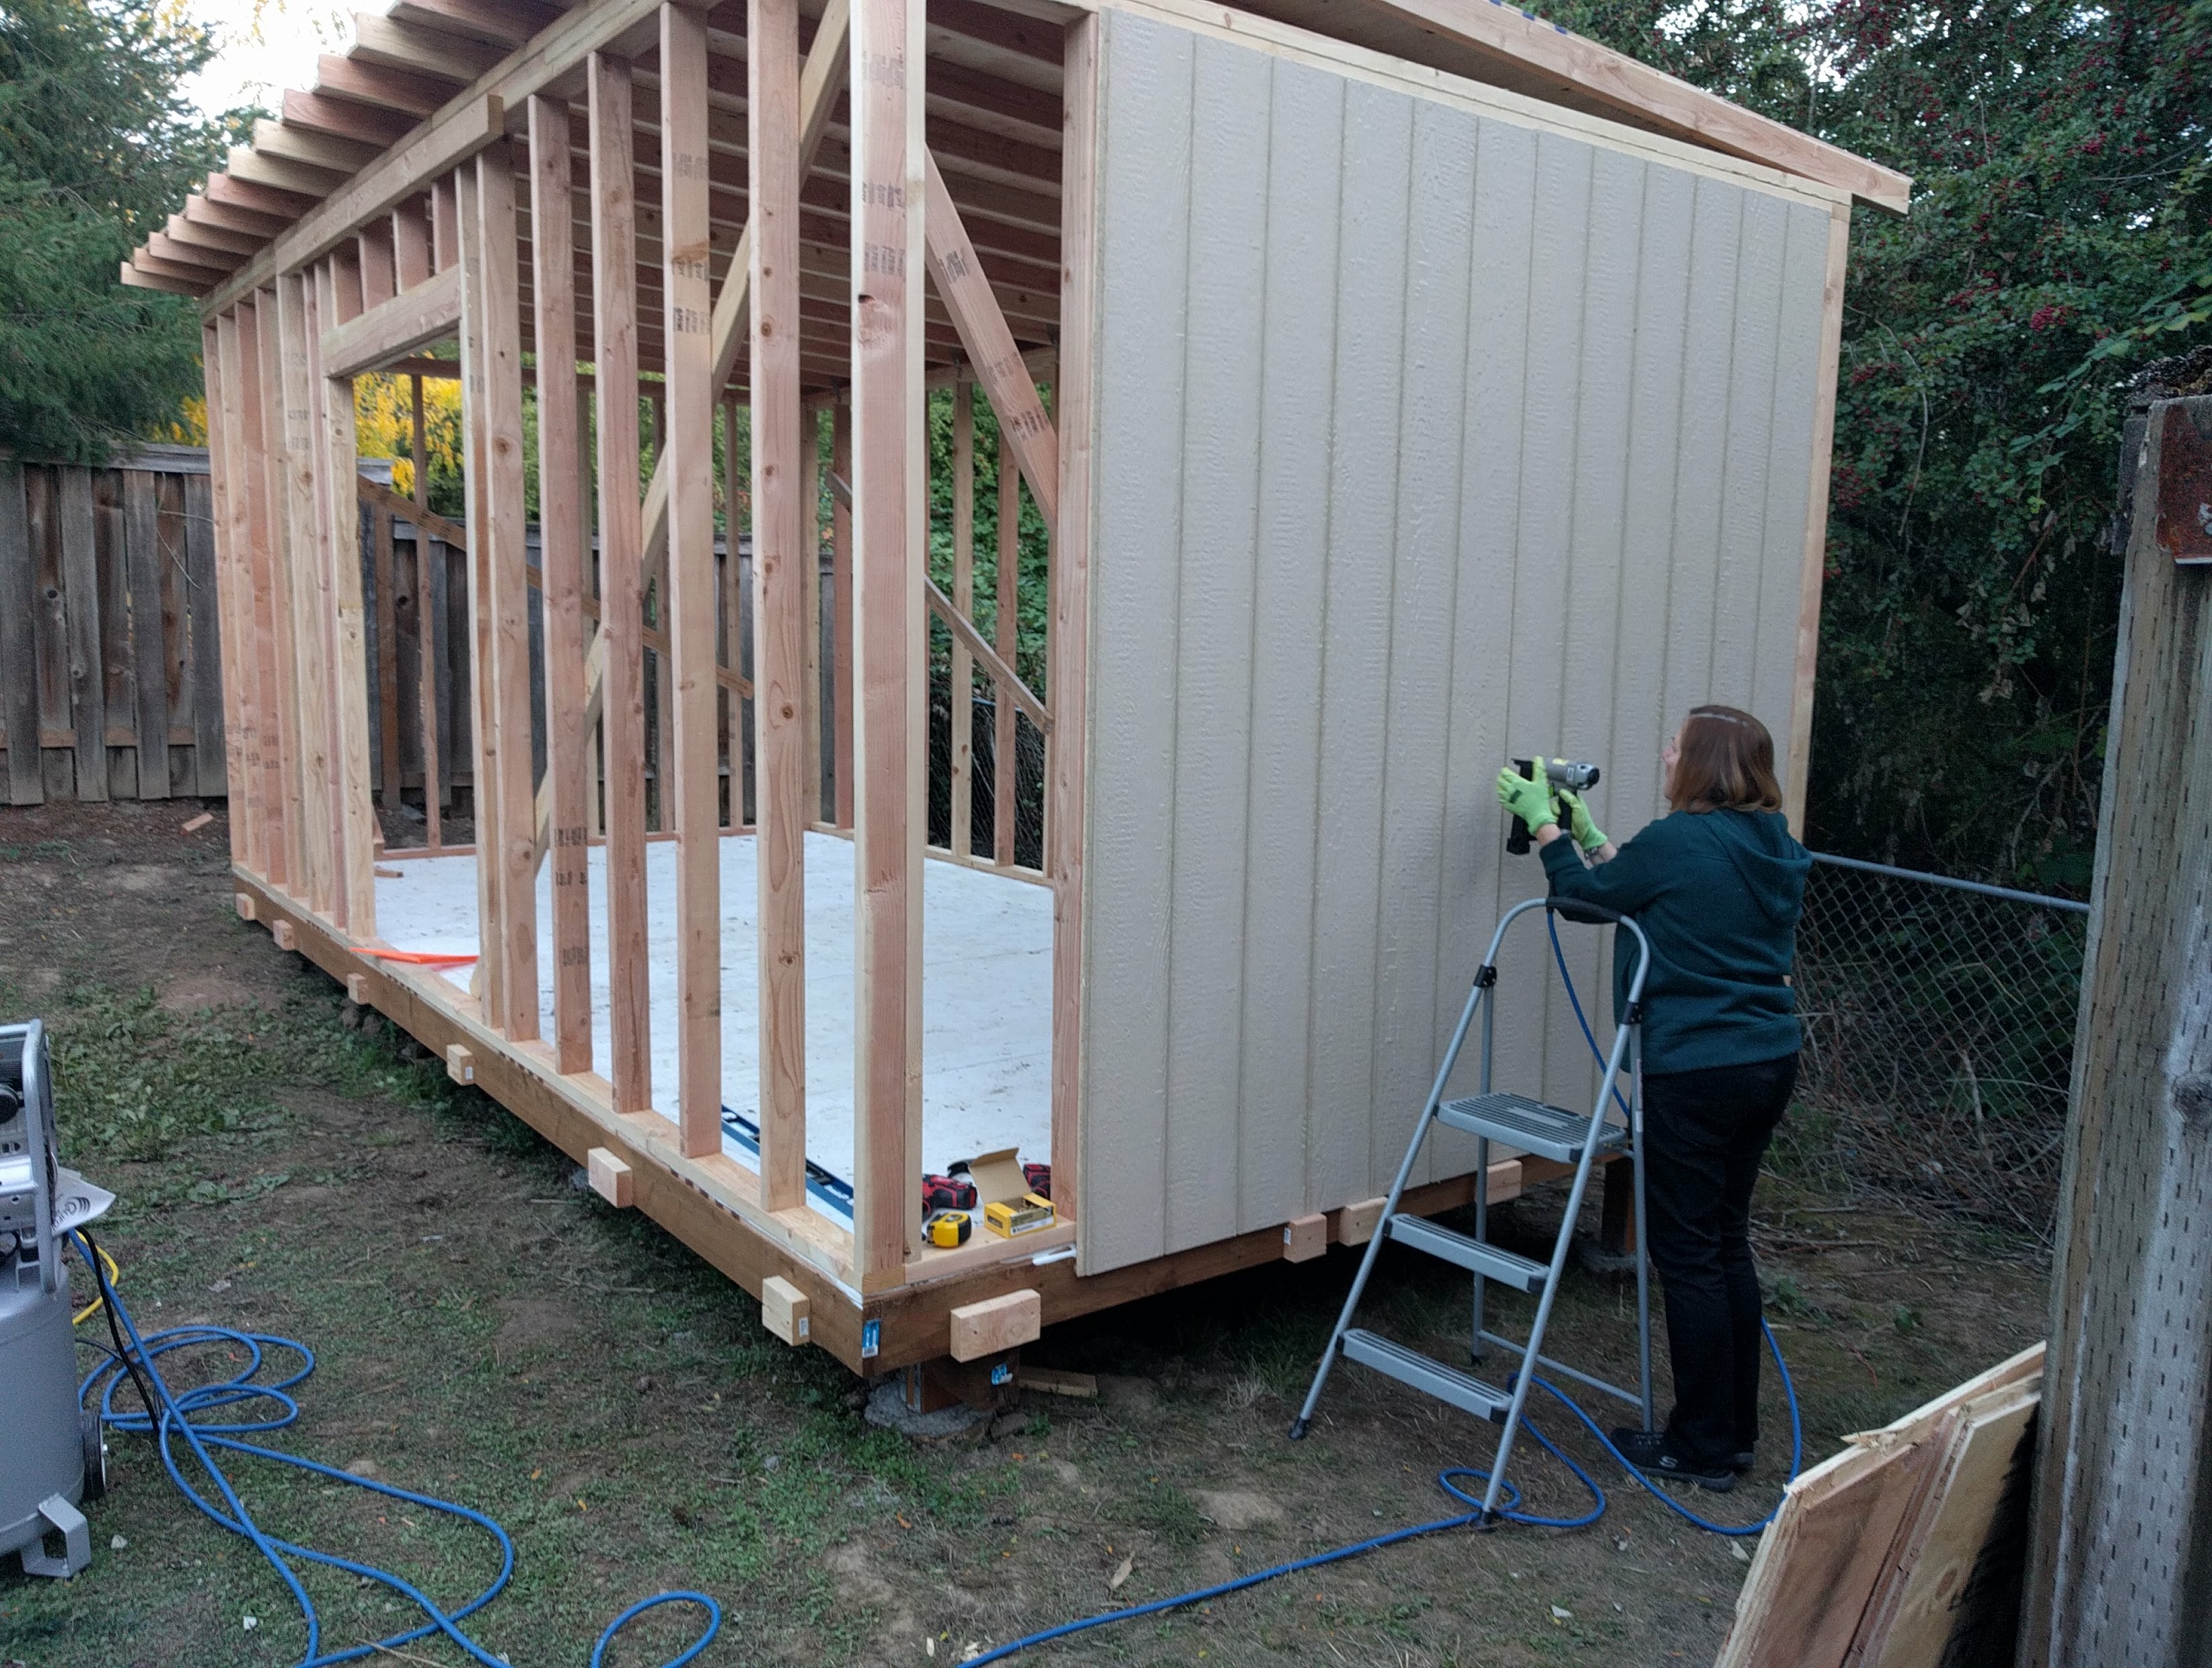
2017-10-05 Again, having my mother to help with the shed was a huge help. In this picture we are attaching the T1-11 siding. The siding is held by a few screws and a few hundred brad nails. That 18ga brad nailer came with my air compressor and works fine, but in hindsight I wish I had opted to purchase the proper 15ga framing nailer for this job.
Also pictured here is one of the largest mistakes I made in this construction: the sheets are already in-place on the roof. I had gotten in my head that I needed sheeting on the roof to protect against the rain. However, a structure like this derives ridgitiy from the siding. Even with the cross bars quickly attached for support it was nerve racking to work on the wobbling structure. And nerviousness aside, I struggled with attaching the roof sheets squarely. The siding should have been installed first.
2017-10-07 Scabbing in siding to finish the 10ft walls. To clean up the boards I used a circular saw or a router with a flush bit. I'm still undecided which technique I prefer: the circular saw produces faster, cleaner cuts but can cause damage if not directed properly. The router will trace an edge effectively but I am scare of using hand routers expecially when on a ladder, and the cutting is slow.
Finishing the Structure
With the structure largely finished I could slow down, but I still wanted a more water-tight structure as Oregon's winter loomed ahead.
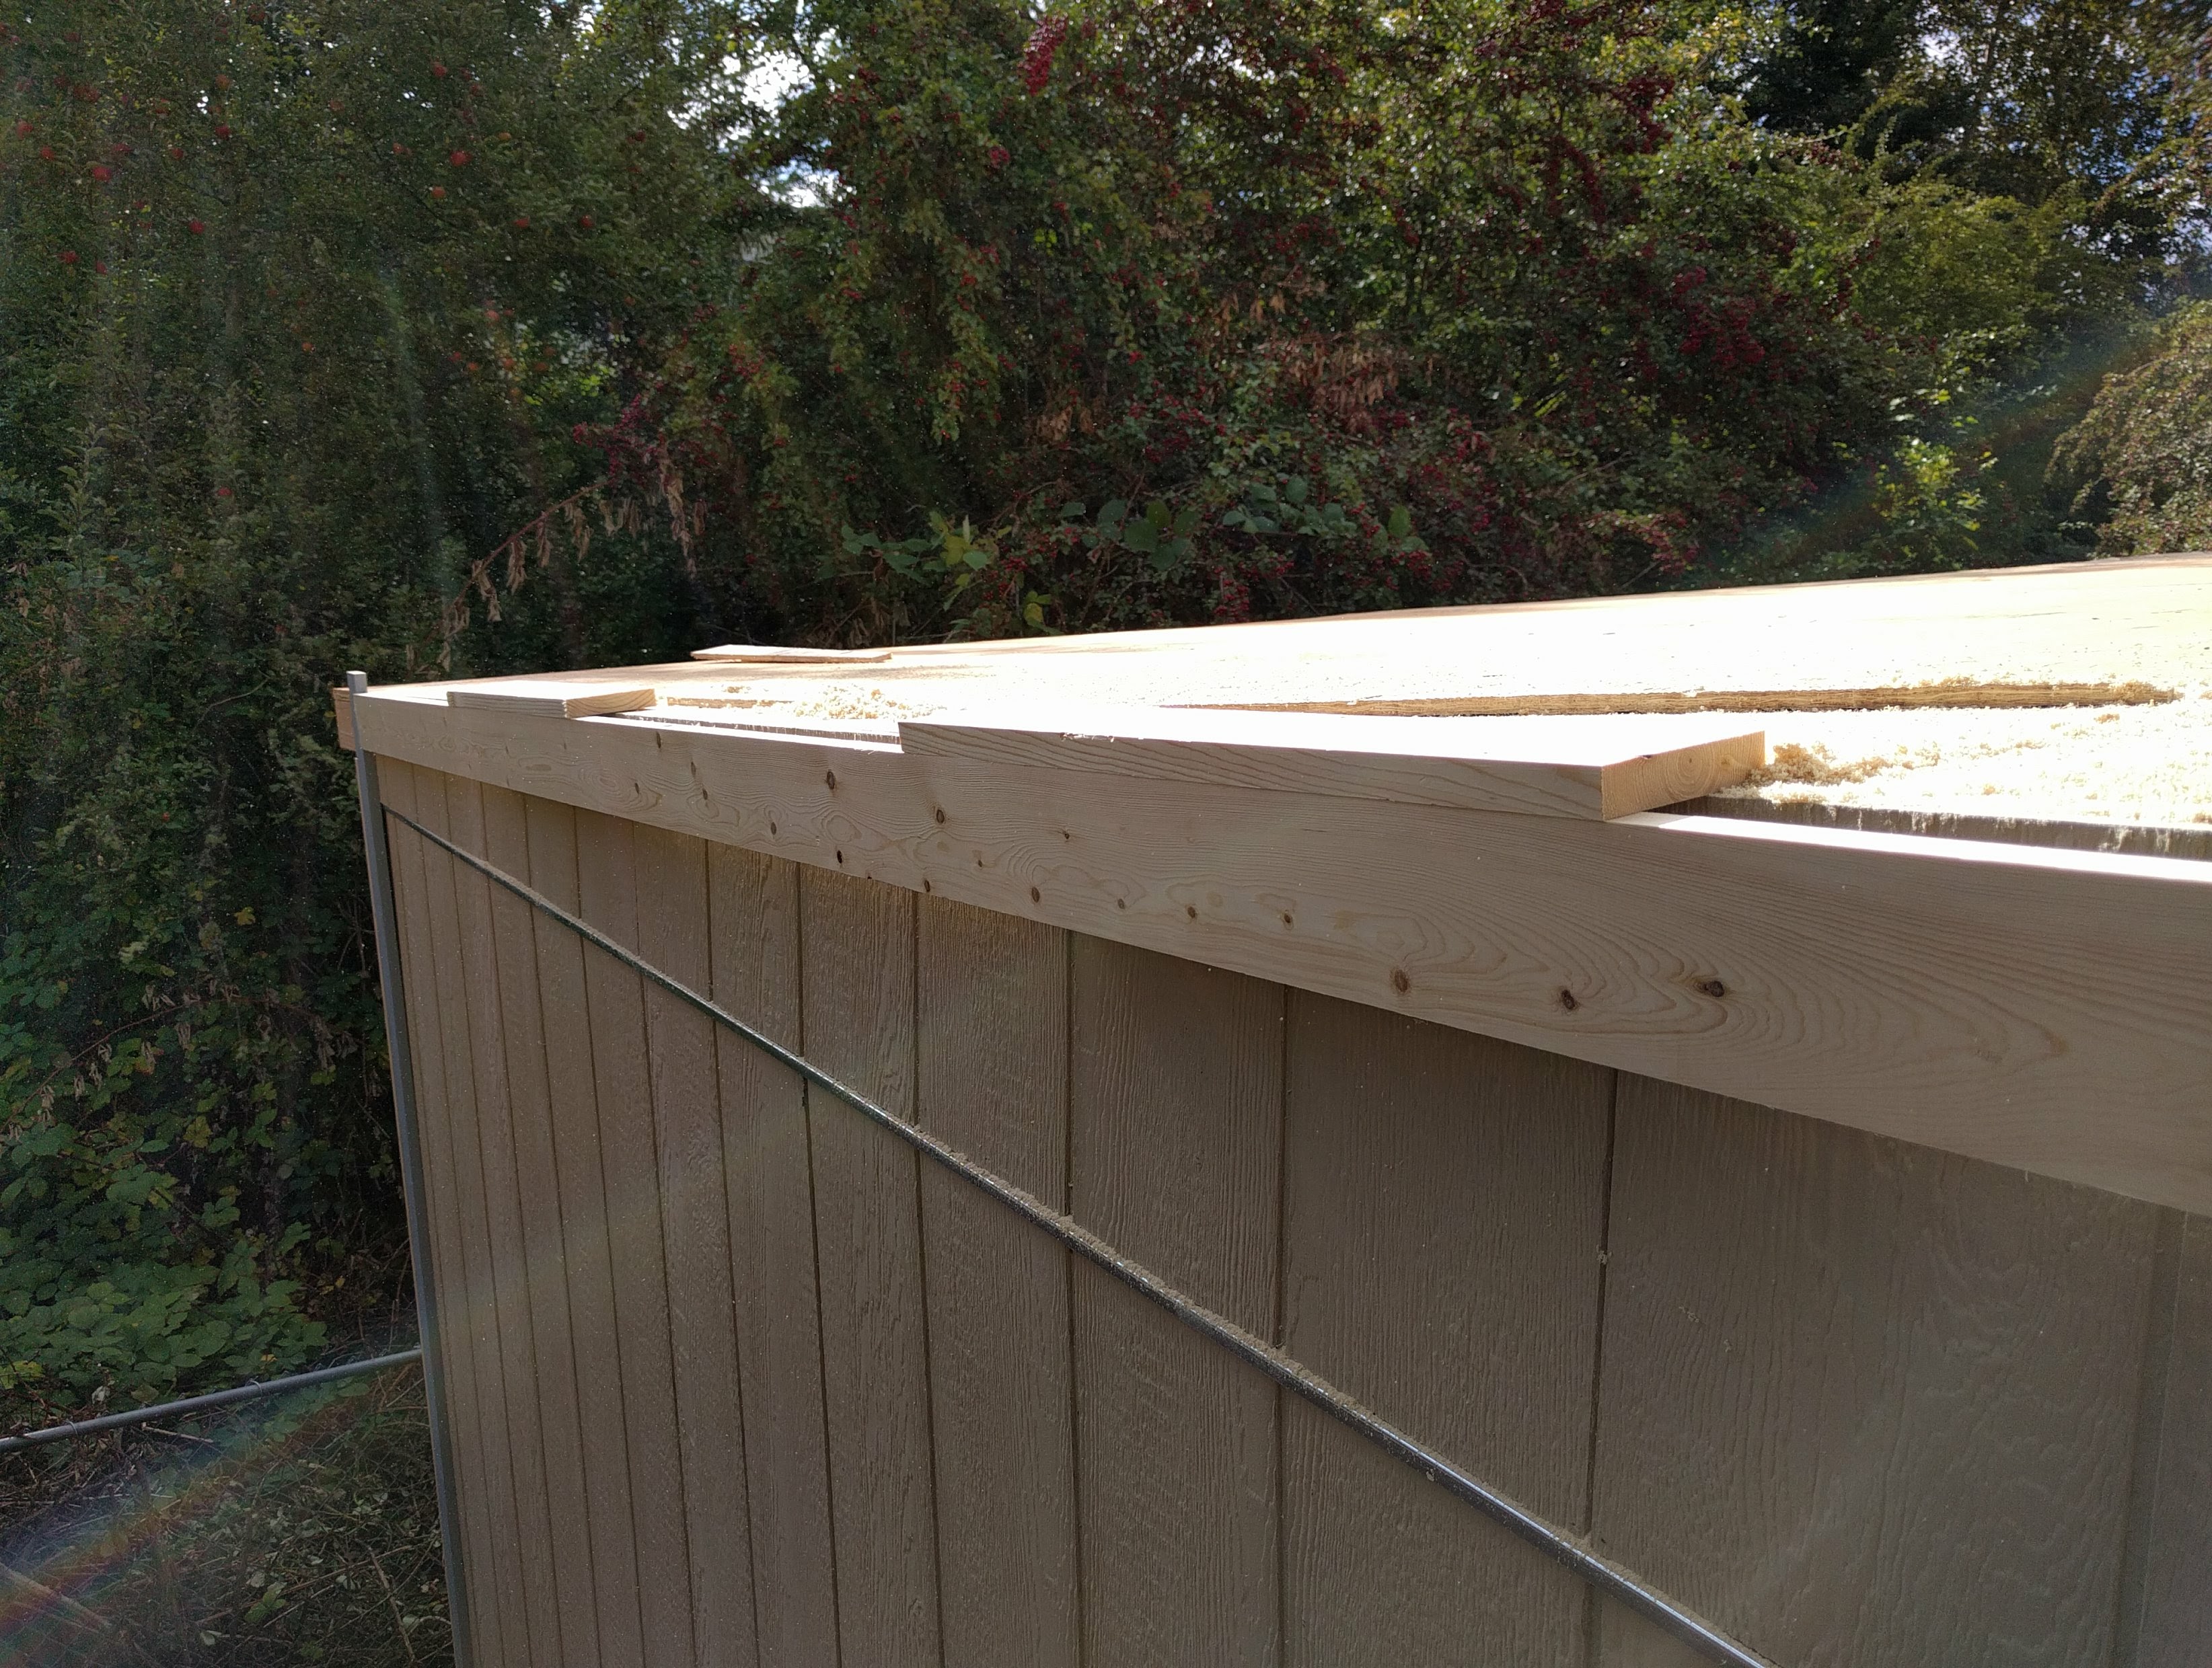
2017-10-08 Crawling on the roof to attach trim boards. I had to do a lot of small surgery thanks to my inability to attache boards squarely to the joists.
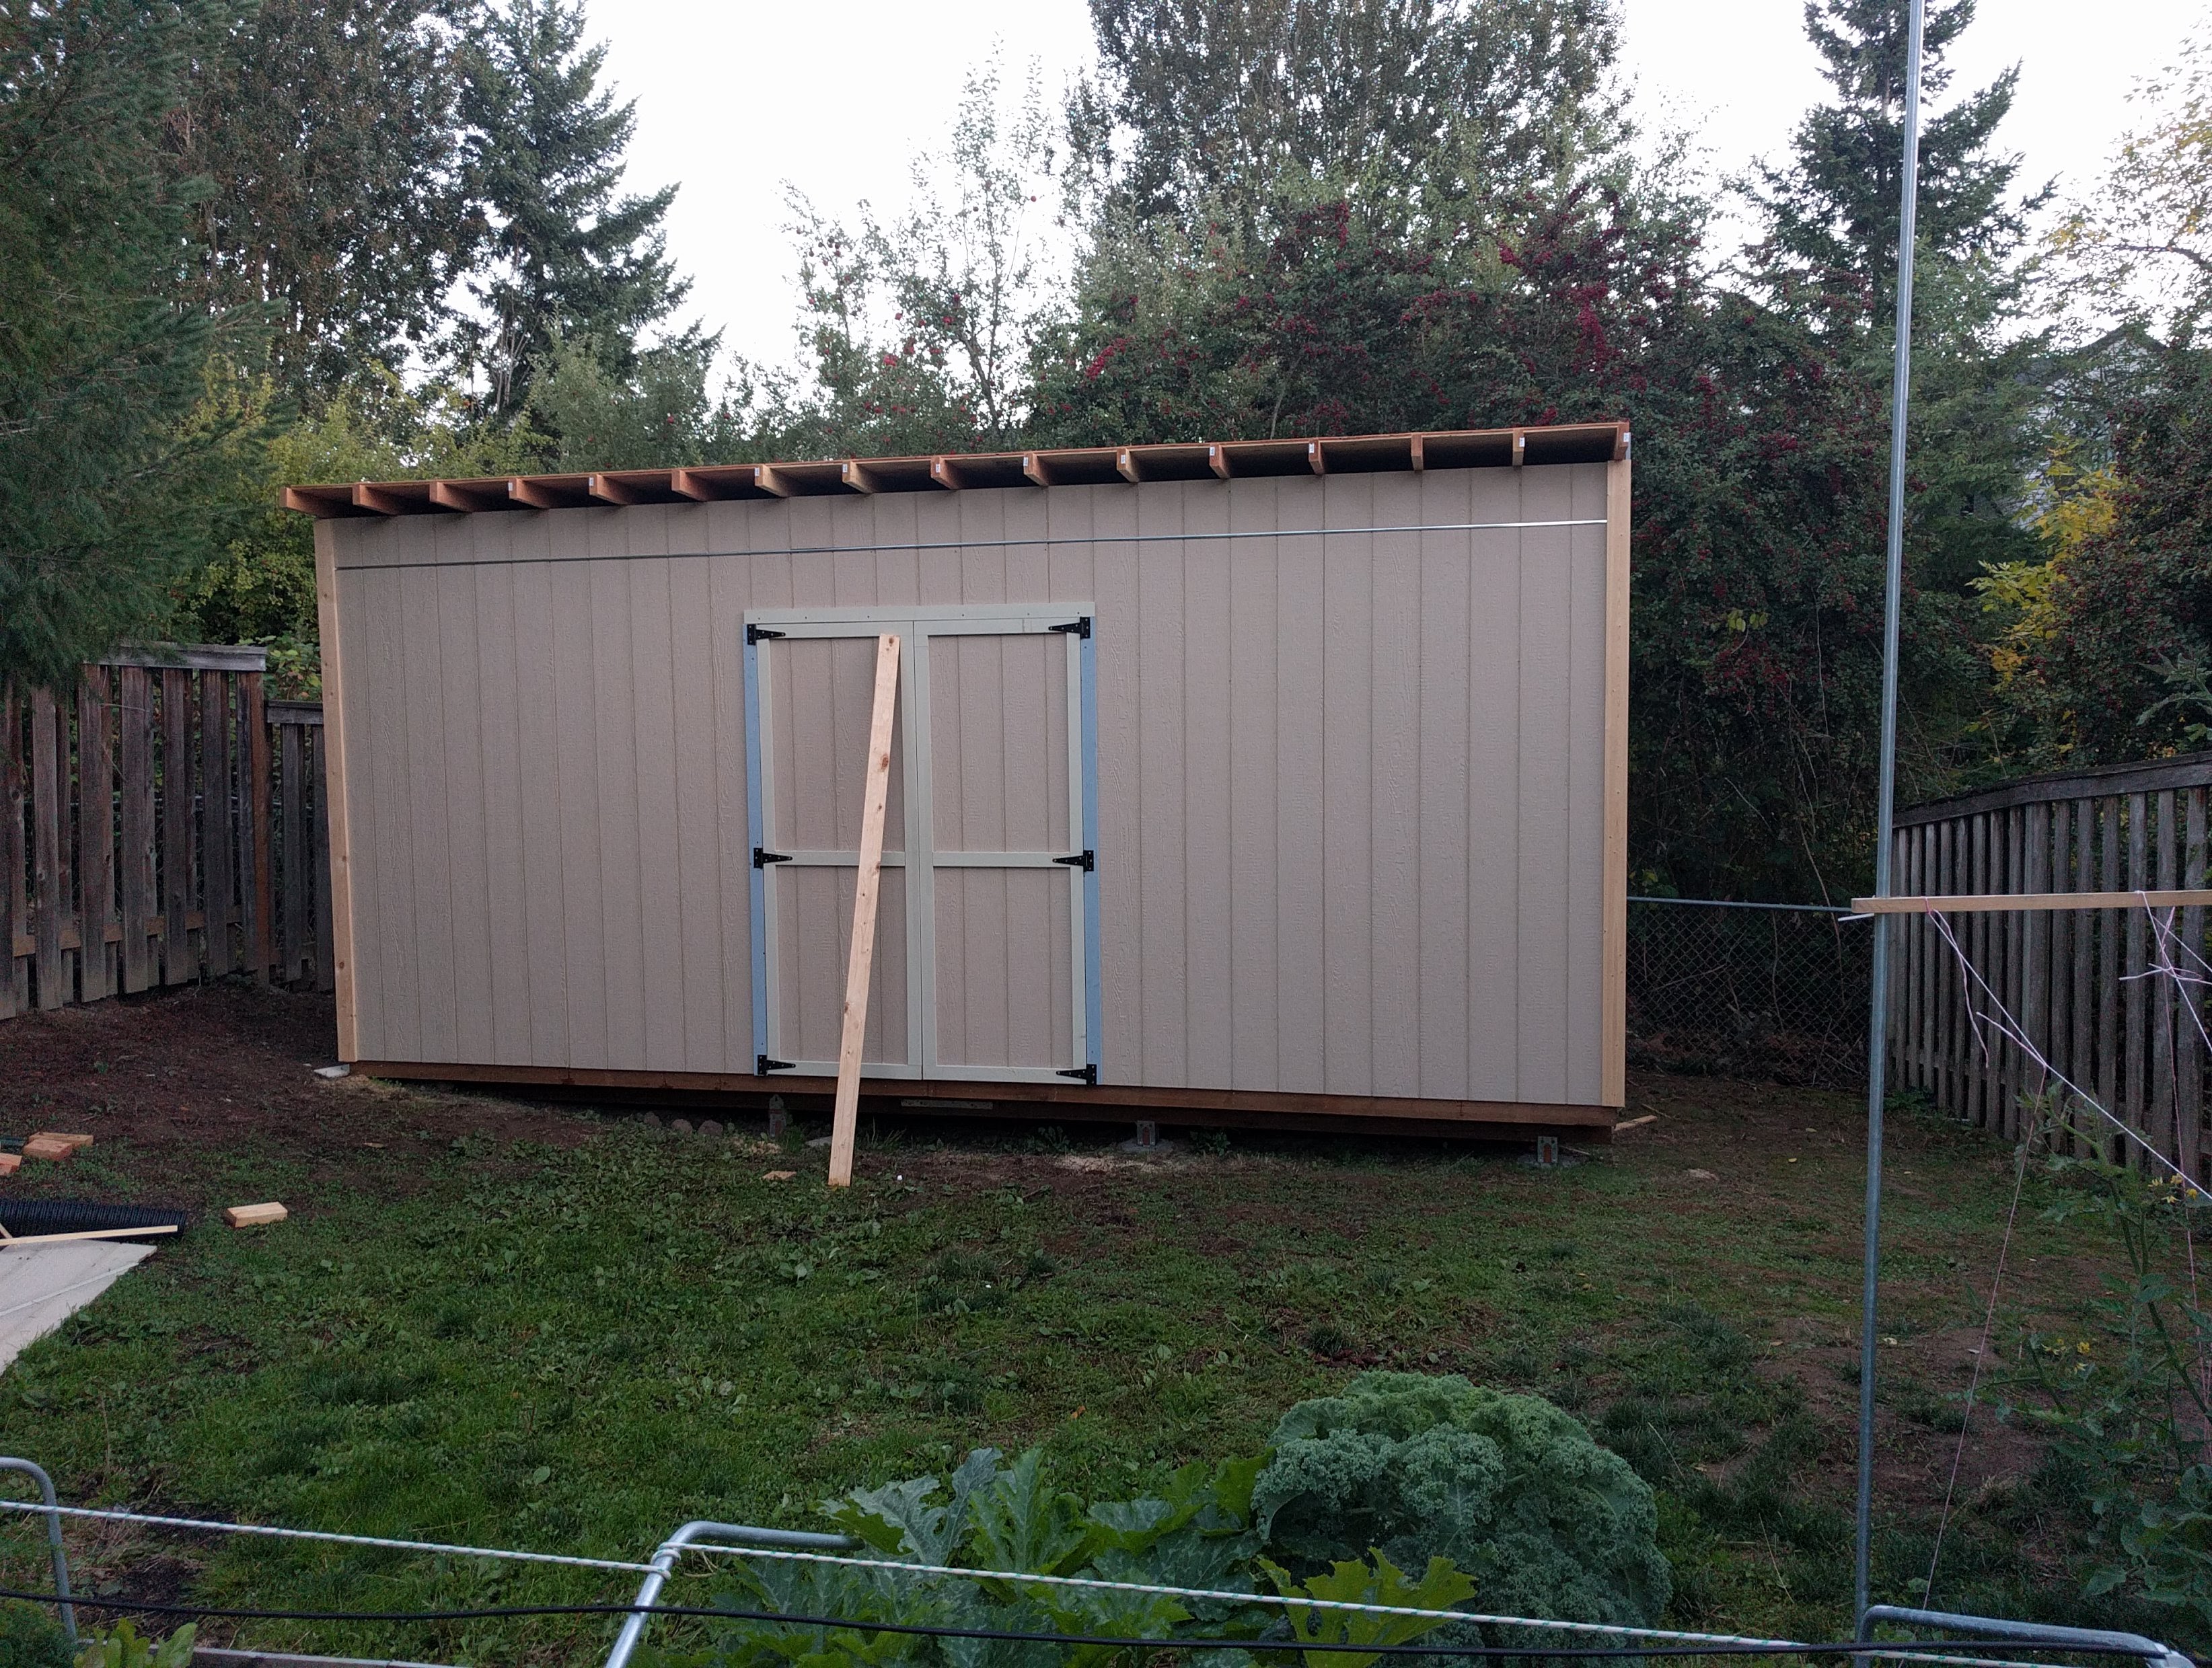
2017-10-13 Doors built and attached. They turned out well, but they definatley take some effort in order to swing properly. I also added a padlock instead of a board leaning against the structure.
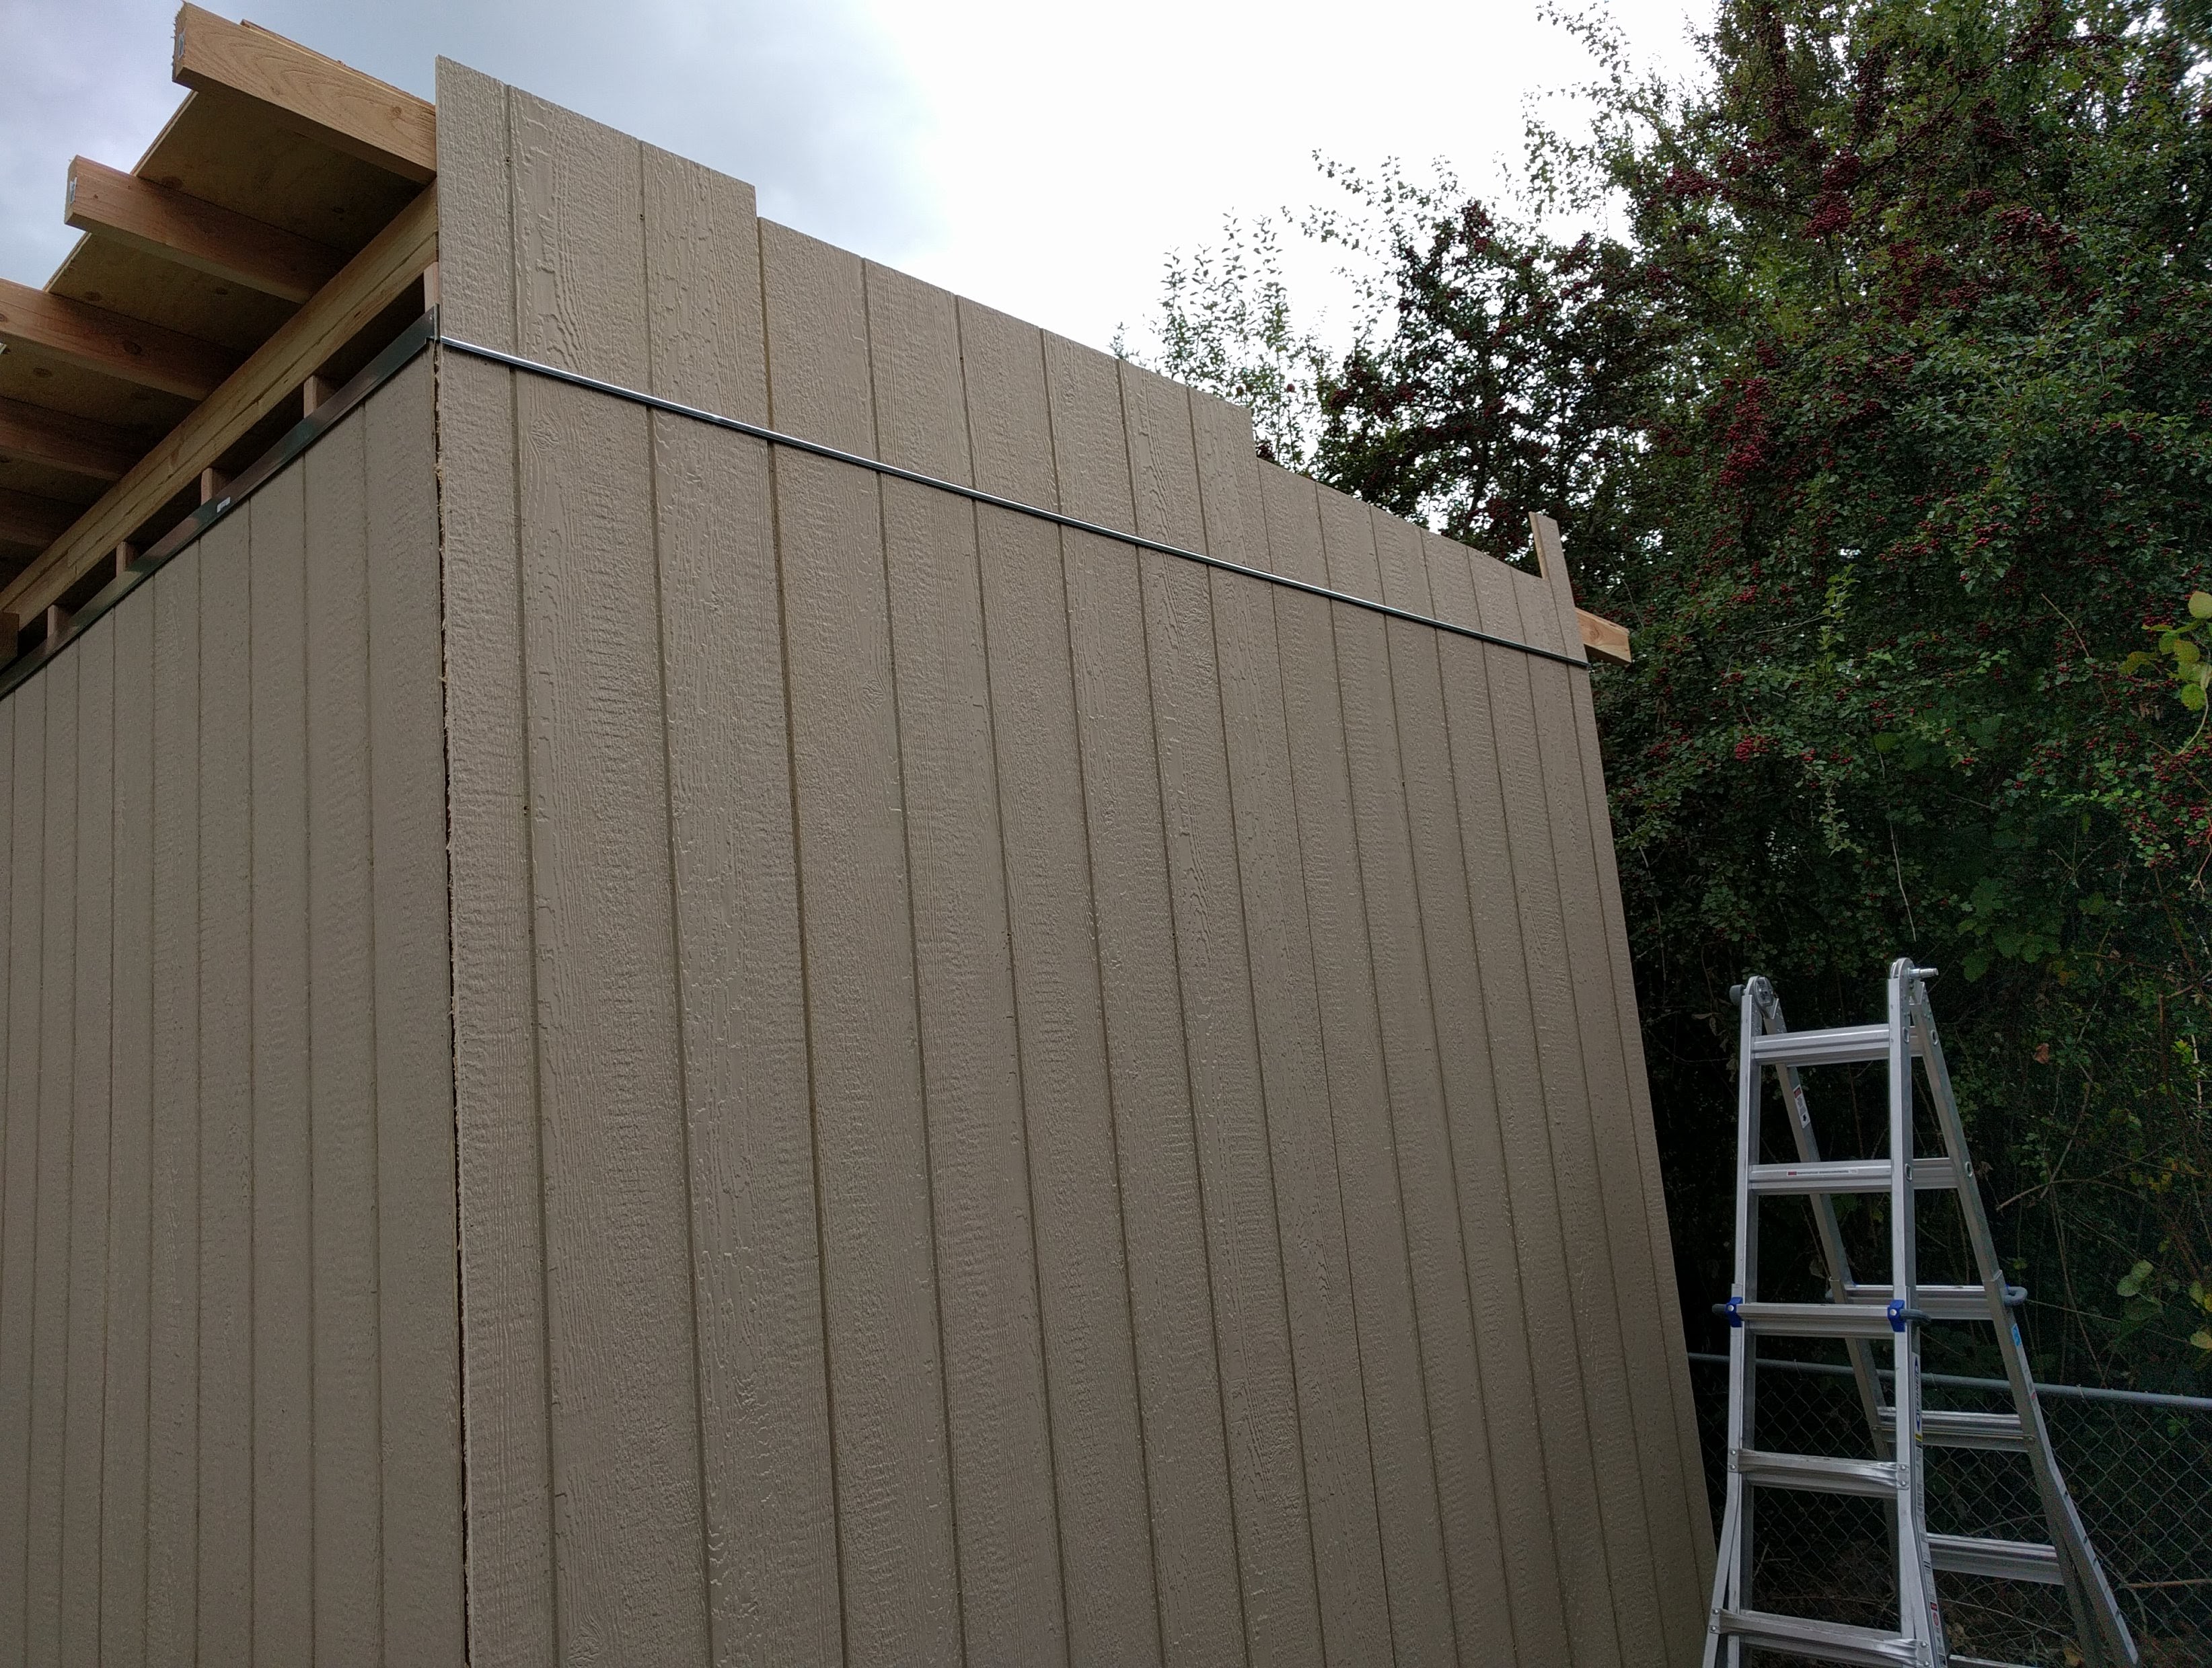
This is also a good pictue to comment on the ventalation at the top. This is not according to the plans, but during the summer I can enter the shed and it is only marginally warmer than ambient. Later I used a staple gun to attached gutter mesh to keep animals out, and so far I have not noticed any new tenants.
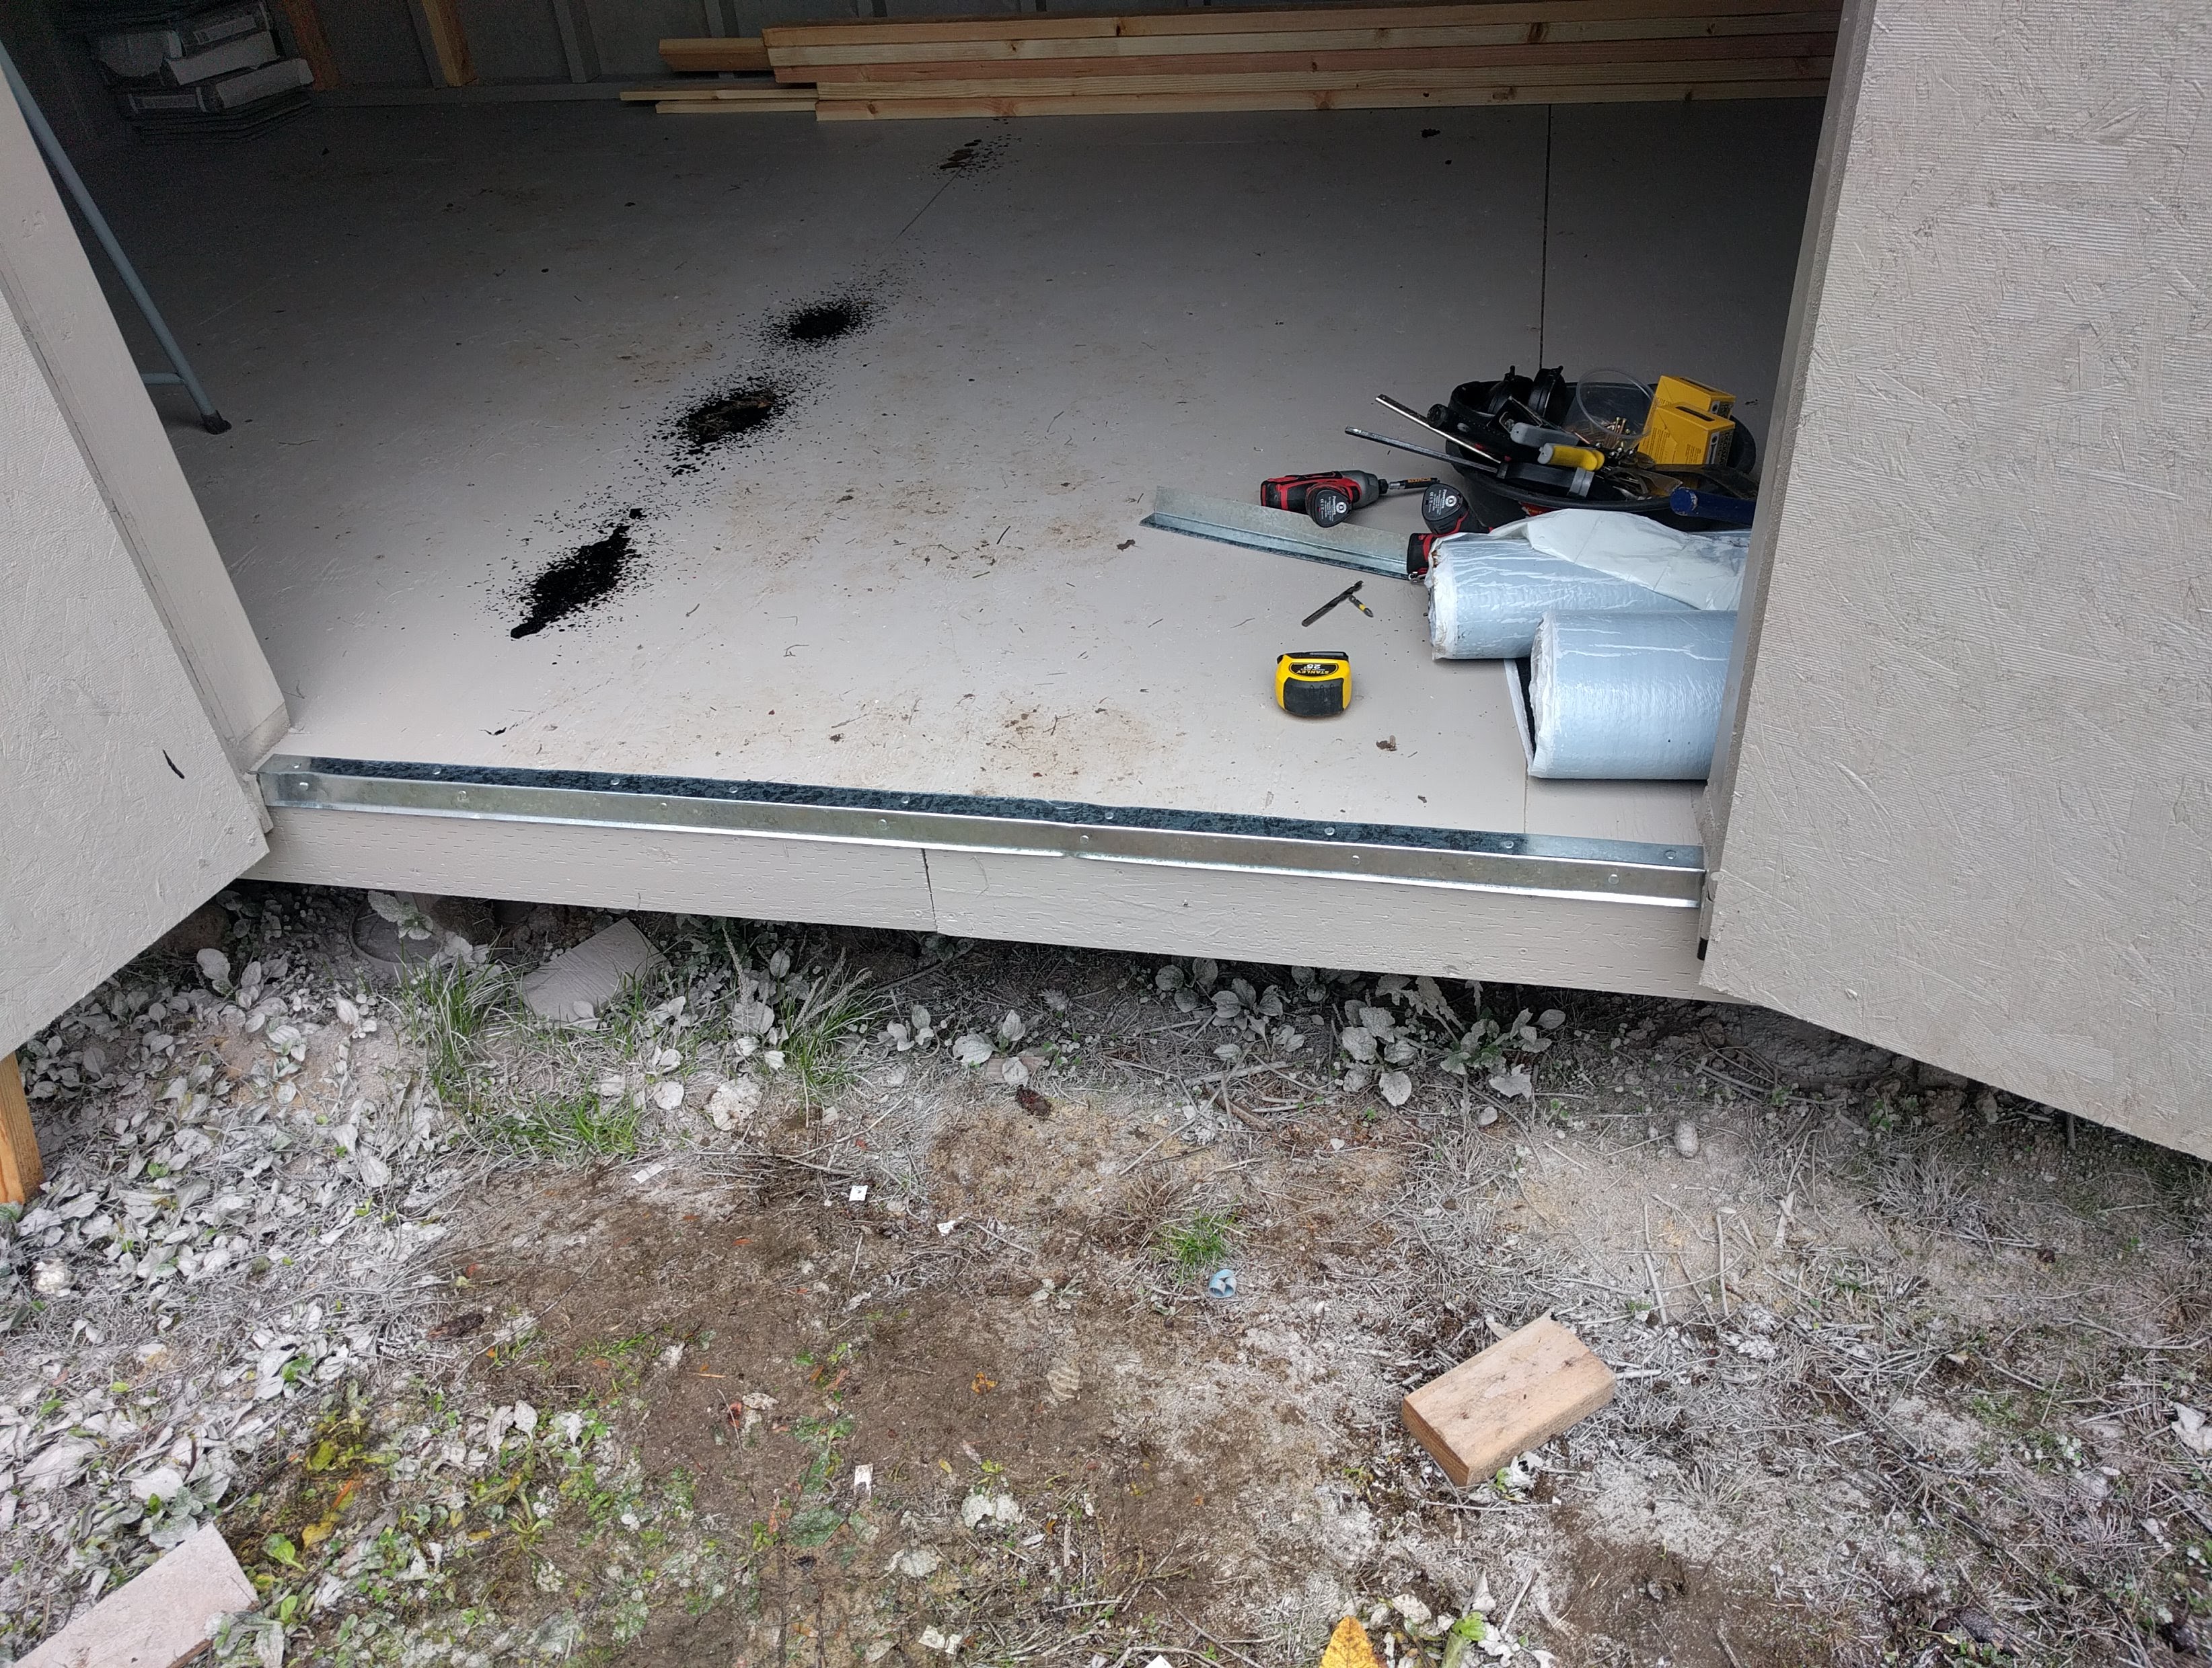
2017-10-22 The reminats from roofing the shed. I used self-adhesive roll on roofing designed for low slope applications. I found the instructions confusing because there are many optional steps in applying the roofing. For example, and optional step is to tar the surface before rolling out the roofing. I had some foundation sealant that I applied to the roof, but it just made a mess (seen on the floor here). That said, I managed to install the roll-on roofing myself in a few hours, and I would most likely use the product again.

2017-10-28 I had some extra materials left over from the construction which were quickly drafted into building shelves for the shed. I am particularly proud of my wood storage rack on the right of the picture, which uses some left over t1-11 to permit a cantilever for storing boards.
Perhaps not vey noticable is the shed is now painted, including the interior. I chose the same colour as my home exterior which is a boring grey. By renting an airless paint sprayer I was able to finish in four hours. My biggest problem was not having enough paint; the exposed joists of the interior took a lot of paint to cover.
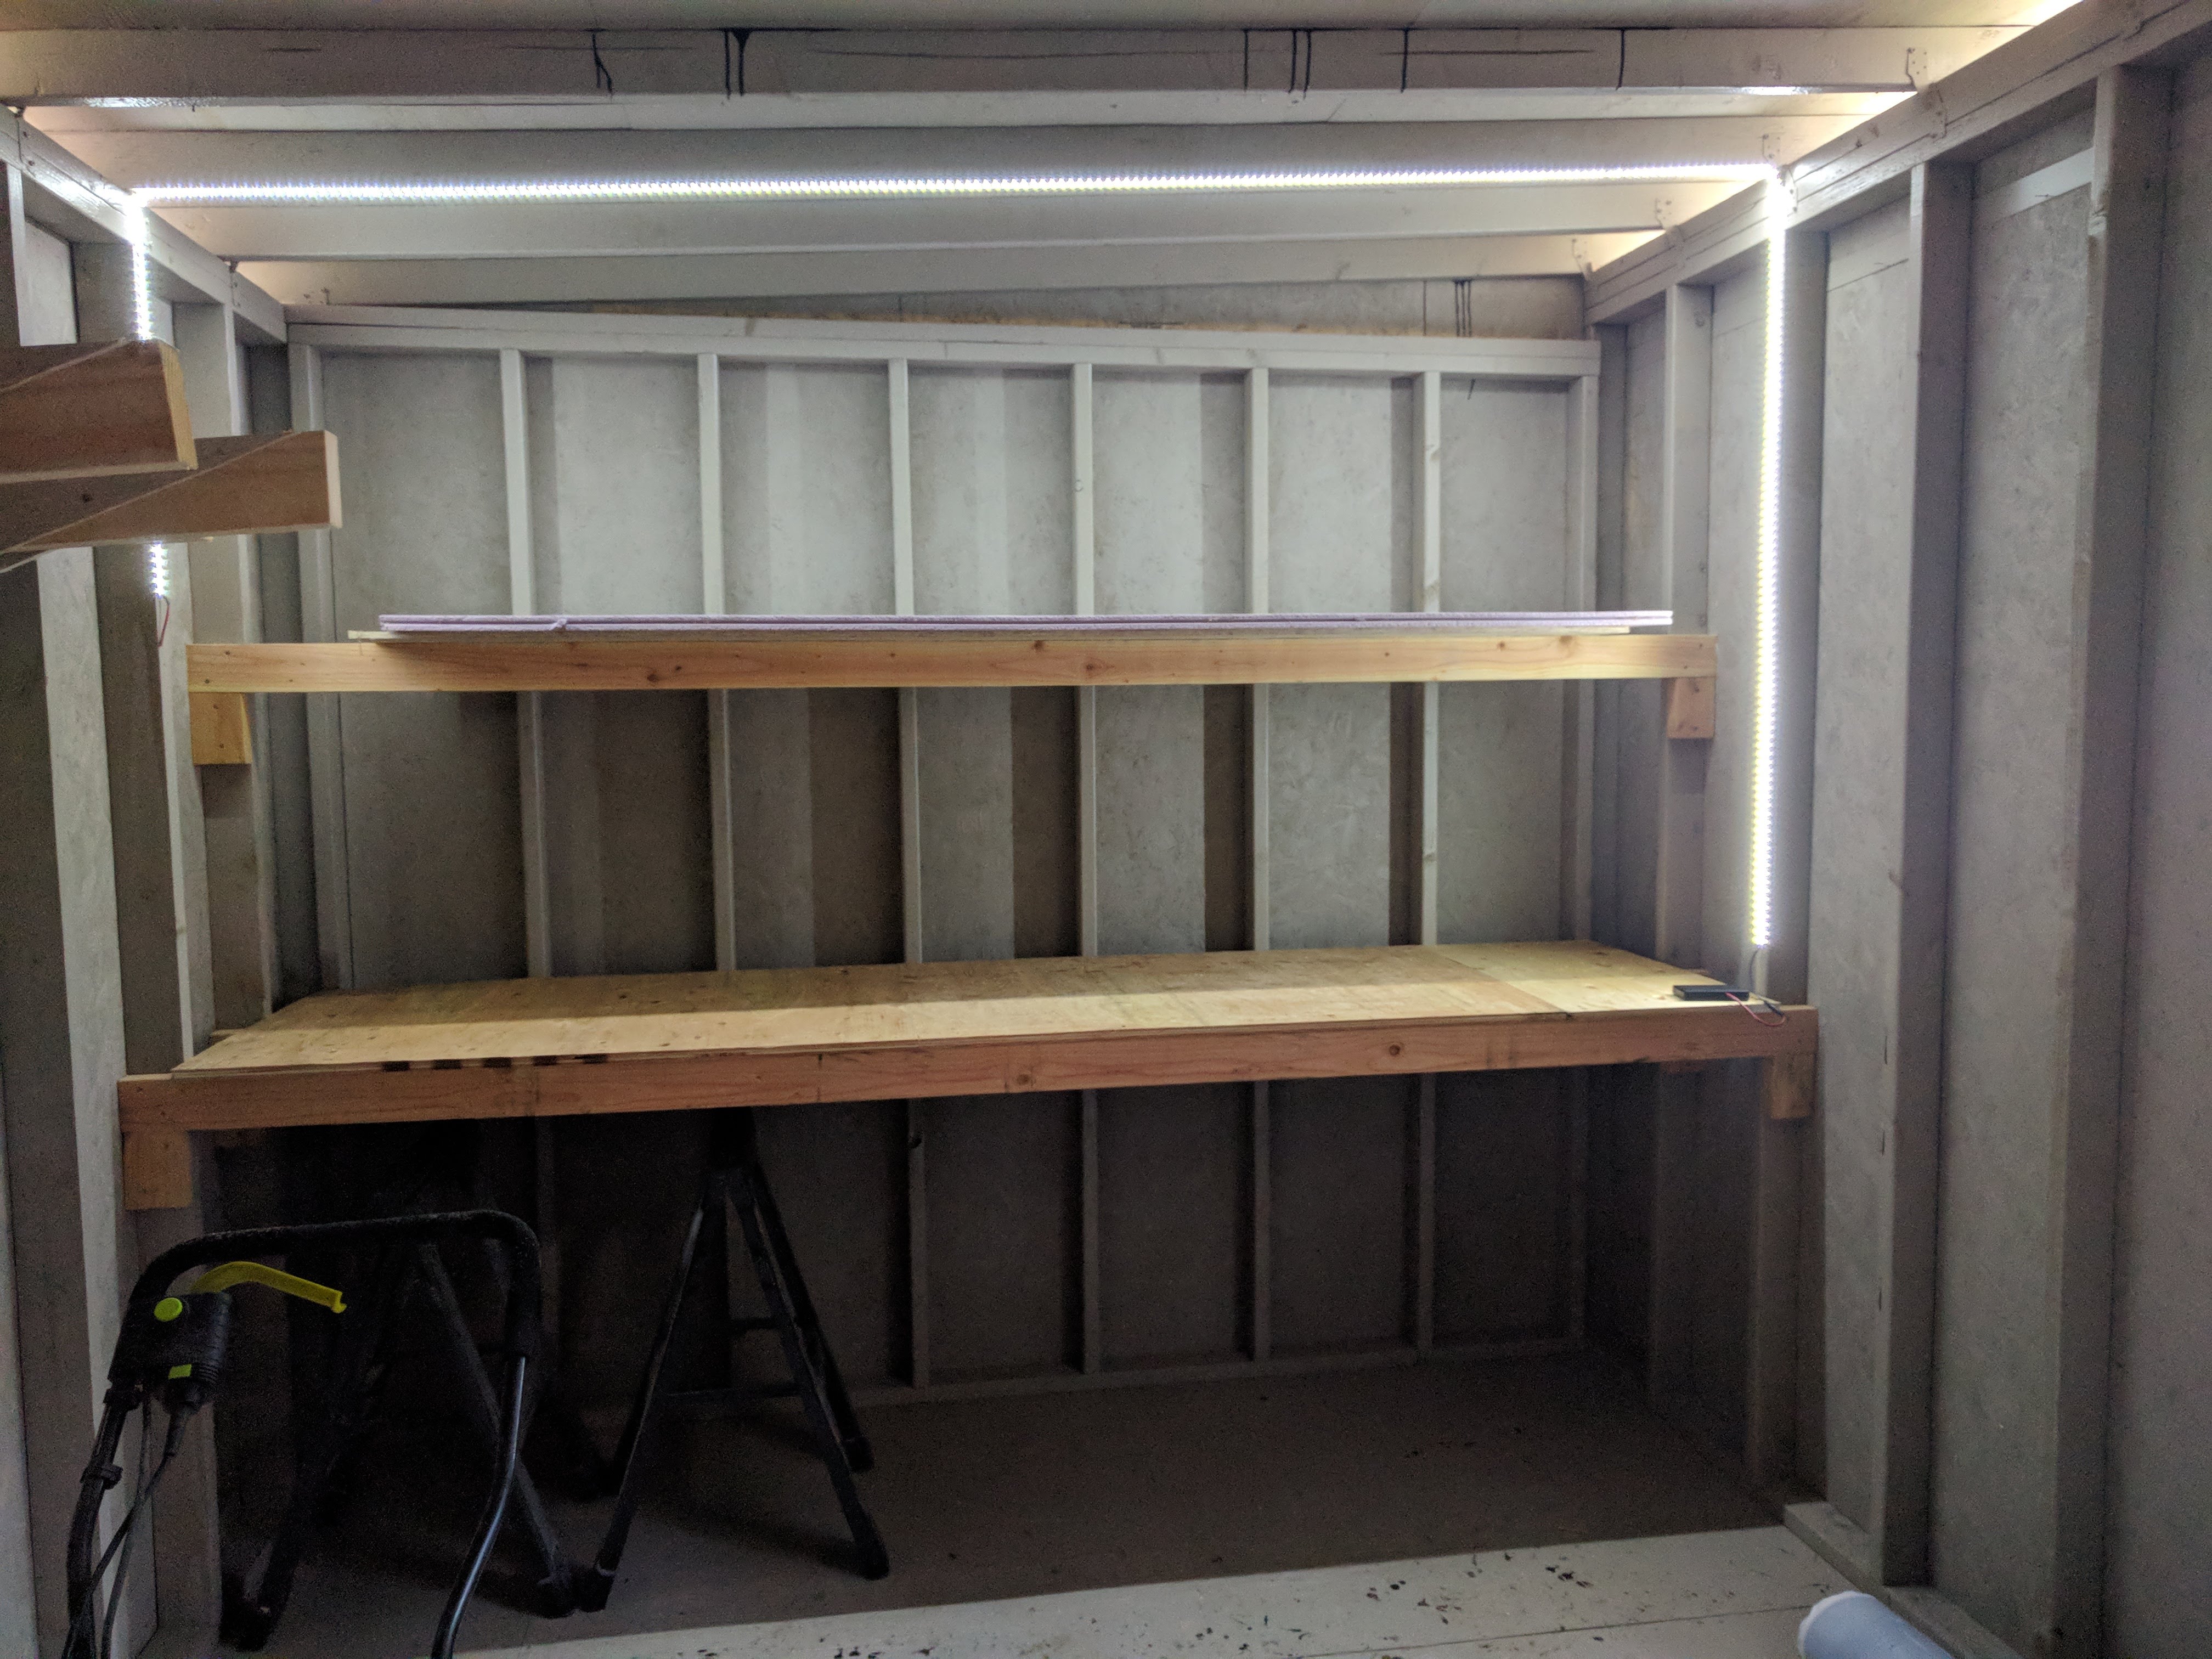
2018-01-13 My shed does not have electricity. While I would like to add that in the future, electricty would require a permit and running the line accross my french drain. For now, I have some 12V LED strip lights with batteries. These are a nice accessory, but during the day the door provides the most light.
Learnings and Reccomendations
Building this shed was a fun, satisfying project. I take great pride on the quality of construction, and would change very little from my workflow if I needed to build another similar structure. Some considerations:
Financial
Excluding labour, I estimate I saved 1-2 thousand dollars on the project over a kit or prebuilt shed. A foundation would be also be needed for a kit, so no savings would of occured there. Kits may advertise features like additional doors or windows, but from my perspective I need only one large door and as many walls as possible for storage.
For my labour, I probably have 40 hours actively working on the structure or collecting materials from the home improvement centre. Additionally, in the months leading up to the construction I invested a significant time researching how to build a structure. I probably have around 40 hours in this research time, although much of this time was when I would watch how-to videos anyway.
In total I spent $3352.45 on raw materials, along with 100-200 dollars for new tools, tool rental and consumables:
| Date | Item | Quantity | Cost Ea | Cost | Store |
|---|---|---|---|---|---|
| 2017-09-06 | Gravel 50lb | 3 | 4.25 | 12.75 | HD |
| 2017-09-06 | Quickcrete 80lb | 9 | 3.97 | 35.73 | HD |
| 2017-09-06 | Concrete tube | 3 | 12.97 | 38.91 | HD |
| 2017-09-02 | 1x2 | 8 | 1.05 | 8.40 | HD |
| 2017-02-17 | Shed plans | 1 | 13.00 | 13.00 | Amazon |
| 2017-09-13 | 2x6x8 PT | 1 | 9.37 | 9.37 | HD |
| 2017-09-13 | 2x4x8 PT | 3 | 5.92 | 17.76 | HD |
| 2017-09-13 | 2x6x10 PT | 22 | 11.67 | 256.74 | HD |
| 2017-09-16 | H2.5 Z Tie | 52 | 0.58 | 30.16 | HD |
| 2017-09-16 | Screws 2-1/2 10lb | 2 | 29.94 | 59.88 | HD |
| 2017-09-16 | Frame Anchor 3x4in | 4 | 0.43 | 1.72 | HD |
| 2017-09-10 | 4x6x10 PT | 4 | 27.27 | 109.08 | HD |
| 2017-09-10 | 4x4 Post Base | 8 | 7.73 | 61.84 | HD |
| 2017-09-10 | 4x4 Post Cap | 4 | 8.77 | 35.08 | HD |
| 2017-09-10 | Screws 1-3/4 1lb | 1 | 7.94 | 7.94 | HD |
| 2017-09-16 | Screws 1-1/4 1lb | 1 | 7.94 | 7.94 | HD |
| 2017-09-14 | Screws 3-1/2 1lb | 1 | 7.94 | 7.94 | HD |
| 2017-09-12 | Strap Tie 18" | 2 | 1.37 | 2.74 | HD |
| 2017-09-30 | 2x4x96 | 34 | 3.23 | 109.82 | HD |
| 2017-09-29 | 2x4x10' | 18 | 5.58 | 100.44 | HD |
| 2017-09-29 | Tarp 19x29 | 1 | 23.99 | 23.99 | Harbor Freight |
| 2017-09-28 | Paint - Behr Porch & Patio 1 Gallon | 1 | 30.78 | 30.78 | HD |
| 2017-09-28 | 2x4x8' | 24 | 3.74 | 89.76 | HD |
| 2017-09-28 | 23/32 4x8 CDX Ply | 7 | 30.68 | 214.76 | HD |
| 2017-10-01 | 2x4x12' | 17 | 6.58 | 111.86 | HD |
| 2017-10-01 | 2x6x12' | 1 | 10.68 | 10.68 | HD |
| 2017-10-03 | 23/32 Ply Subfloor | 9 | 34.68 | 312.12 | HD |
| 2017-10-03 | T-111 Siding | 20 | 31.47 | 629.4 | HD |
| 2017-10-04 | Exterior Screws 1-5/8 | 2 | 9.37 | 18.74 | HD |
| 2017-10-07 | Black Hinge 6in | 6 | 2.99 | 17.94 | Harbor Freight |
| 2017-10-07 | 1-1/4in 18GA Brads | 1 | 2.99 | 2.99 | Harbor Freight |
| 2017-10-07 | 1in 18GA Staple | 1 | 3.99 | 3.99 | Harbor Freight |
| 2017-10-07 | Z flashing | 7 | 4.78 | 33.46 | HD |
| 2017-10-07 | 1x4-10ft | 8 | 5.12 | 40.96 | HD |
| 2017-10-07 | 1x4-12ft | 2 | 7.56 | 15.12 | HD |
| 2017-10-07 | 1x3-12ft | 4 | 9.42 | 37.68 | HD |
| 2017-10-07 | 1x3-12ft | 6 | 5.98 | 35.88 | HD |
| 2017-10-08 | Roof Edge | 6 | 4.21 | 25.26 | HD |
| 2017-10-15 | Liberty Flat Roof | 3 | 92 | 276 | HD |
| 2017-10-15 | Roofing Nails 1lb | 1 | 2.98 | 2.98 | HD |
| 2017-10-15 | Roof Edge | 3 | 5.32 | 15.96 | HD |
| 2017-10-14 | Exterior Paint 1gal | 10 | 47.49 | 474.9 | HD |
Mistakes and Wins
A brief list of the major mistakes and wins on the construction of this project:
- Mistakes:
- Sheeting the roof before siding. This was dangerous, resulted in off-square attachment of the sheets, and had me attempting to mitigate the poor and rapid attachment through the rest of the project
- Applying tar before rolling on the roofing. I applied the roofing after painting the structure, so and runs of tar are clearly visible. Even if the tar was painted over, it would show overtime, and it was messy to apply. What really frustrates me is I applied window flashing in a similar fashion over difficult-to-reach joints, and I believe it worked better than the roofing tar
- Dollar store level was not trustworthy and cost me an evening of work
- 18ga brad nails are not the correct choice for applying T1-11 siding, and I think they ultimately cost me time
- Wins:
- Using screws everywhere. With the exception of roofing nails to hold the drip edge and the brad nails, I used star bit screws everywhere. Combined with an impact gun, it went quickly. I suspect a professional could move faster with a nail gun, but the ease of removal and control of a screw is critical for a novice
- Foundation is overkill. This could be considered bad, but I am not worried about any part of the foundation failing. There should be no wood exposed to soil in this structure
- I did not use any fancy tools. The purchases made for this project specifcally are my level and string level, and a router with a tracing bit (but they weren't required). Otherwise I used tools I already owned: shovels, wheelbarrel, hammer, drill, impact driver, circular saw, roofer's square, ladder, paint roller, brad nailer (optional), tape measure.
- Low slope roof design change. This saved on cutting material and allowed me to use the easy to apply roll on roofing.
Final Thoughts
This is a relatively small project, but the techniques applied mirror real home construction. A shed is a low risk and budget undertaking, but really let me demonstrate the limited learnings of construction I've encountered through TV or conversations. It also has freed up space in my garage, which is one half car bay and one half workshop.